The days before Easter Sunday are hellish for supermarket workers in Italian-American cities such as Chicago, Philadelphia, and Providence. That's because every Italian woman, whether practicing Catholic or not, will be storming her local supermarket to purchase an obscene amount of eggs. (My mom used to buy between 12-15 dozen every year.) Lord help the poor dairy manager who runs out of eggs.
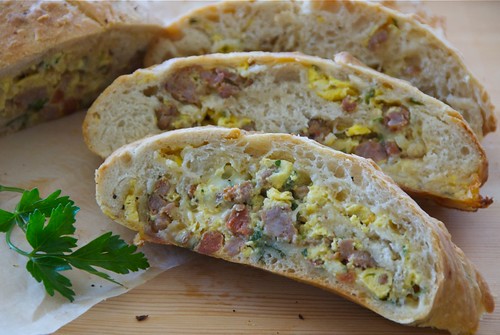
It's a sight to see. A gaggle of women trying to box one another one, in an effort to select the best eggs. It's the older Italian ladies who are most successful; they have honed their skills over the years. After all, they need to stockpile eggs. How else will they make deviled eggs, braided sweet bread, sausage bread, and a host of pies?
Every Italian Easter table will have one or two savory pies, such as pizza chena (meaning "full pie"), a massive two-crusted pie filled with eggs and various Italian meats and cheeses and pastiera Neopoletana, a time-intensive pie made from ricotta cheese and soaked wheat kernels.
The jewels of the Italian Easter table, however, are the sweet pies, namely custard, ricotta, and rice. Custard pie should be dense, creamy, and mile-high. Italian ricotta pie (torta di ricotta), an Italian cheesecake closely associated with Easter, is typically laced with citrus flavors but can also be made with nuts and/or chocolate.
Rice pie (torta di riso), which is served only at Easter, is like a cross between rich ricotta pie and creamy lemon panna cotta (an Italian cooked cream). It is made with eggs, rice (usually arborio), ricotta cheese, and citrus (usually lemon). It tastes best on the Monday morning after Easter for breakfast.

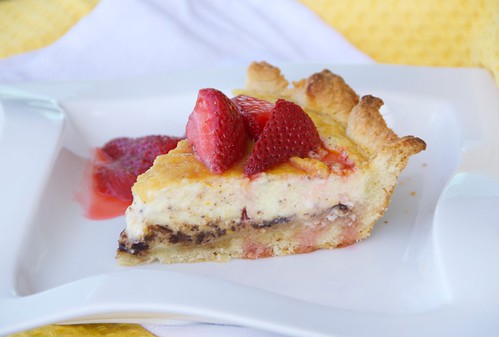
Since Jeff and I won't be in Rhode Island for Easter this year, I wanted to have a taste of Easter in San Diego. There are only two of us, so I had to be selective. I chose one traditional pie, Italian rice pie with lemon, and one with a modern twist, Chocolate-Orange Ricotta Pie with Sambuca Spiked Strawberries.
Rather than make my grandmother's famous Italian Ricotta Pie with Pineapple, I wanted something a little different this year. Instead of pineapple, I added orange zest and melted chocolate, a pleasantly sweet and citric combination. As the ricotta cooks it seeps into the bottom crust making it almost cake-like, while the edges retain a satisfying flakiness. Each serving is enhanced with a topping of sambuca spiked strawberries. The sambuca's mild anise flavor highlights the natural sweetness of the strawberries and pairs beautifully with the creamy ricotta.
I just looked at the clock. It's 7:53 am, so I've gotta run. I want to be at market when it opens at 8am and the shelves are fully stocks with eggs. I'm not taking any chances. After all, San Diego has a sizable population of Italian women.
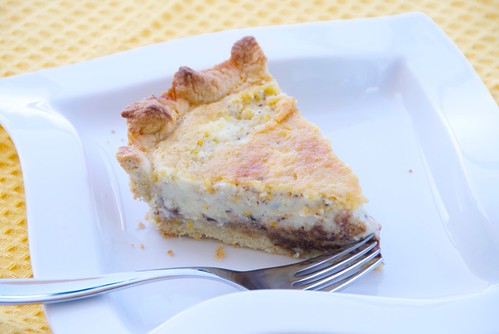
Italian Chocolate-Orange Ricotta Pie with Sambuca Spiked Strawberries
Makes one 9-inch pie.
Print recipe only here.
Crust:
1 1/2 cups all-purpose flour
1/4 cup sugar
1/2 teaspoon salt
1/2 teaspoon baking powder
3/4 stick unsalted butter (chilled)
1 extra large egg or 2 small eggs
1-2 tablespoons ice water
1/2 teaspoon baking powder
3/4 stick unsalted butter (chilled)
1 extra large egg or 2 small eggs
1-2 tablespoons ice water
Filling:
3 eggs1 cup sugar
the zest of 1 large orange (about 1 tablespoon)
2 teaspoons cointreau or orange extract
1 cup heavy cream
1 tablespoon cornstarch
1/8 teaspoon ground cinnamon
1 pound ricotta, drained (minimum 2 hours, or preferably
1/4 cup semi-sweet chocolate chips, melted and stirred until smooth
Sambuca Spiked Strawberries:
3/4 cup sugar
3/4 cup water
5 cups sliced strawberries
2 tablespoons Sambuca (an Italian anise flavored liqueur), or more if you'd like a stronger flavor
1. For the crust, combine flour, sugar, salt, and baking powder in the work bowl of a food processor fitted with a metal blade; pulse several times to combine. Add the butter and pulse about 10 times until the dough becomes pebbly in texture. Add the eggs and pulse repeatedly until the dough begins to stick together. Slow add the ice water by the tablespoon, while using a few long pulses. Add more drops of ice water as necessary, until the dough holds together well. Invert the dough onto a floured work surface. Form a ball and flatten in a disc; wrap the disc in plastic wrap, and refrigerate while preparing the filling. You can keep the dough in the refrigerator for up to 2 days before continuing.
2. If you don’t have a processor, then combine the dry ingredients in a bowl; add chunks of chilled butter, and using a pastry blender or two forks, chop the butter until it resembles little pebbles. At this point, add the eggs and ice water, and stir with a spoon until the dough begins to form. Using your hands and working the dough as little as you can, form a ball, and transfer it to a lightly floured surface. Knead until the dough holds together. Form the dough into a ball, wrap in plastic, and refrigerate while preparing the filling. You can keep the dough in the refrigerator for up to 2 days before continuing.
3. To make the filling, add the eggs, sugar, orange zest, and cointreau to a large bowl. Using a hand-mixer on medium-low, mix until well combined. Add the heavy cream, cornstarch, and cinnamon, and beat on low until well combined. Stir in the drained ricotta and melted chocolate, and mix with a rubber spatula until well combined. Place bowl in the refrigerator.
4. Place a rack in the lower third of the oven and preheat to 450 degrees F. Coat your pie plate with cooking spray. Turn out the dough onto a lightly floured surface and roll into a 10- inch circle. Transfer the dough to the prepared pie plate, gently pressing it into the bottom and sides. Prick the bottom of the crust a few times with the tip of a fork. At this point, set the crust in the freezer for about 15-20 to get it really chilled, which will make for a flakier crust.
5. Remove the chilled crust from the freezer and pour the filling to about 1/4 of an inch below the top of the crust, as it will puff up slightly when baking.
6. Bake at 450 degrees F for 15 minutes, then lower the temperature to 325 degrees F and cook for 25 minutes, or until the filling puffs up, turns golden, and is “set,” meaning it should not be jiggly when you gently move the pie plate. Remove from oven and let cool on a rack. Serve at room temperature or chilled.
7. For the strawberries, bring water and sugar to a boil in a medium heavy-bottomed saucepan. Lower the heat and simmer for about 8-10 minutes, or until the sauce begins to thicken slightly. Add the strawberries and cook 2-3 minutes, or until soft. Turn off heat and stir in sambuca. Cool slightly before serving. If not using immediately, re-heat slightly if the syrup hardens.
Note: If you have some extra filling left over, you can pour it into a small baking dish or ramekin for a crustless version. Just reduce the baking time.
You might also enjoy these Italian dessert recipes from Food Blogga:
Italian Easter Rice Pie
Italian Easter Ricotta Pie with Pineapple
Italian Lemon Egg Biscuits
Here are more creamy ricotta desserts you might enjoy:
Ricotta Pound Cake recipe at Proud Italian Cook
Orange and Chili Pepper Ricotta Cheesecake recipe at Kitchen Unplugged
Fresh Ricotta with Warm Honey and Cinnamon recipe from Souvlaki for the Soul