Wednesday, August 15, 2012

Baby Eggplants: The Cute Factor


The other day at Sprouts, a local grocery store, a woman saw me selecting baby eggplant.

She asked, "Do you like those?"

"Oh, I adore them," I said. "They're much sweeter and more tender than large eggplants."

"How do you cook them?" she asked.

"Lots of ways," I replied. "You can saute them, stuff them, broil them."

She screwed up her mouth, looked perplexed. "Mmmm... I don't know," she mumbled.

I scanned her shopping cart and noticed she had a bag full of baby eggplants in it. I said, "Well, you must like them too."

"Me? No, I don't really like eggplant," she said. "I only bought these cause they're just too cute to pass up."

Blame it on the cute factor — you know, when you buy something not because you love or need it but because it's too cute to pass up.

We continued talking, and I gave her several suggestions of how to cook baby eggplant. She seemed relieved. In fact, baby eggplant are quite versatile: They can be grilled, broiled, sauteed or baked and pair well with Asian, Indian, and Mediterranean flavors.

Here are eight great ways to enjoy baby eggplant:

1. Make eggplant chips: Slice paper-thin, toss in olive oil and salt and bake at 350 for 15 to 20 minutes, turning once, until crisp.

2. Broil 'em: Thinly slice, brush with olive oil and broil until browned. Douse with fresh lemon juice, salt and pepper and sprinkle with finely chopped fresh mint or basil.

3. Stuff 'em: Cut off the tops and scoop out the flesh. Saute flesh with olive oil and shallots and transfer to a bowl. Add some bread crumbs, Parmesan cheese, parsley, egg, salt and crushed red pepper. Mix together and stuff eggplants. Bake at 350 for 20 to 25 minutes, or until tender.

4. Glaze 'em: Thinly slice and broil or grill until tender and brown. Drizzle with a warm balsamic-honey reduction and sprinkle with chopped fresh rosemary.

5. Saute 'em: Saute thin slices in olive oil until browned and tender. Toss with goat cheese, lemon zest, lemon juice, extra virgin olive oil, and mint.

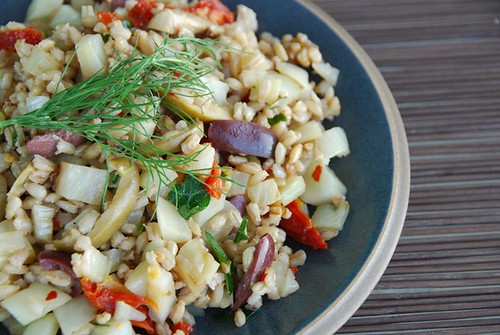
6. Pickle 'em: Pickled eggplant is a unique addition to an antipasto platter. Check out these pickled eggplant recipes from Punk Domestics.

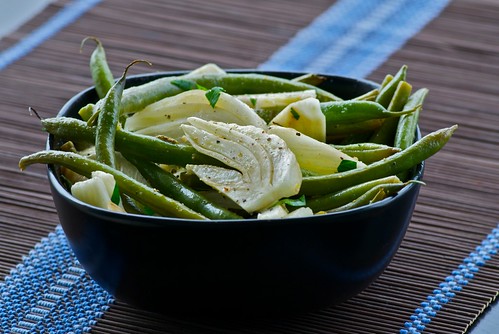
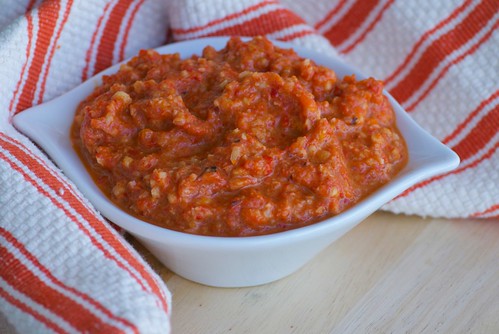
7. Grill 'em: Slice slightly thicker and brush with olive oil. Grill for 4 to 5 minutes per side, or until lightly charred. Serve with Romesco sauce or drizzle with a balsamic reduction.

8. Curry 'em: Cut into chunks and saute in olive oil with diced onions and chilies. Add Indian curry powder or other spices such as garam masala and turmeric. Add coconut milk and a thickening agent such as cornstarch, and cook until sauce is thickened. Serve over basmati or jasmine rice.

Or make the Asian Chicken and Baby Eggplant recipe below.

How about you? How do you cook with baby eggplants?


Asian Chicken and Baby Eggplant with Toasted Sesame Seeds and Cashews
Makes 4 servings
Printable recipe.

Chicken marinade:
4 (1/2 -pound pieces) of boneless, skinless chicken breast (2 pounds total)
3 tablespoons low-sodium soy sauce
Juice 1 lime
1 tablespoon sesame oil
1/4 teaspoon cayenne pepper
1/4 cup chopped fresh cilantro

Rice:
1 cup wild rice or brown rice
2 1/2 cups water

Eggplant:
10 to 12 baby eggplant, stems removed, and thinly sliced
2 tablespoons sesame oil, divided
2 scalions, thinly sliced
1/4 cup chopped fresh cilantro, plus extra for garnish
1 tablespoon lightly toasted sesame seeds
2 tablespoons roasted unsalted (or salted, if you prefer) cashew halves

1. In a large Ziploc bag or tightly closed container, add chicken and marinade ingredients and shake well. Refrigerate for a minimum of 2 hours or up to 6 hours. 


2. Place rice and water in a medium pot and bring to a boil. Reduce to a simmer, partially cover and cook for 25 to 30 minutes or until the water is absorbed and the rice is cooked through yet still firm.

3. Take chicken out of the refrigerator 20 minutes before cooking. In a large non-skillet over medium heat, warm 1 tablespoon sesame oil. Add the chicken. Cook for 4 minutes without touching. Flip and cook an additional 2 minutes. Add remaining 1 tablespoon sesame oil and eggplant slices. Cook for 4 to 5 minutes, or until the eggplant begins to soften and brown. Add the scallions and cilantro, and stir. Cook until the chicken is nicely browned all over and the eggplant is tender. Spread rice evenly on a serving dish and sprinkle with sesame seeds and cashews, and, if desired, chopped fresh cilantro.

Here are more baby eggplant recipes you might enjoy:
Chili Eggplants recipe by Teczcape
Lebanese-Style Stuffed Baby Eggplant recipe from Fresh Cracked Pepper
Stuffed Baby Eggplant in Peanut Sesame Sauce recipe from The Steaming Pot
Grilled Baby Eggplant with Queso Fresco and Lime recipe from Not Eating Out in New York

Wednesday, August 8, 2012

Update: Cookies for Cody Online Bake Sale


I thought you'd appreciate a follow-up to last week's post about 4-year-old Cody Brasich. Sadly, little Cody passed away this past weekend while in Hospice care, with his mom and dad by his side.

Hundreds of people, including many of you reading this, placed generous bids on the online bake sale and made direct donations to codybrasich.com. So far, over $11, 000 has been raised to help Cody's parents with their exorbitant medical bills.

Thank you for donating, spreading the word, and keeping the family in your thoughts and prayers.

Warmest regards,
Susan

Friday, July 27, 2012

Cookies for Cody Online Bake Sale and Cookbook Auction


The little boy you see here is Cody Braisch, the nephew of fellow food blogger and personal friend, Stephanie Weaver. Since last July, Cody has been battling a rare type of cancer called neuroblastoma and was until recently in remission.

About a month ago, Stephanie asked me to participate in an online baking fundraiser called "Cookies for Cody" to raise money for Cody's cancer treatments. Then, sadly, this past Sunday, Stephanie said Cody was no longer in remission. There are no more treatment options for him.

Cody asked for a carnival, and this past Sunday, his family and friends rallied to make that happen. (You can read more about it here.)

Although the tone of the fundraiser has changed, it is still going to happen, as Cody's parents have incurred over $15,000 worth of medical bills.

Today, I'm asking you to help Cody's parents by bidding in Stephanie's online auction. It begins today and lasts through August 5th. Click here for full details.

Over 50 bloggers and bakers (including me) have volunteered to bake traditional, vegan, and gluten-free cookies to donate to bidders. There are also about 50 signed cookbooks and other culinary gift items available for auction. All proceeds will go to Cody's family.

You can also donate directly to the family at codybrasich.com. Please include "Cookies for Cody" so Stephanie can track donations.

Thank you for your consideration. Please keep Cody and his family in your thoughts and prayers.


Thursday, July 12, 2012

Making the Case for Beets


In my latest NPR piece, "Making the Case for Beets," I explore the deep-seated antipathy towards beets. People have said they taste like, metal, dirt, even smelly socks. That's some hard-core beet hate.

The piece has caused a lot of beet buzz with many comments both praising and bashing beets. I'd love to know where you stand. Do you love beets? Hate them? Let us know, either here in the comment section or over at NPR's comment section.

And don't forget to check out the four recipes I've included.


Red Rice, Roasted Beets, and Greens


Raw Chiogga Beet Salad with Honey-Lime Vinaigrette


Beet Smoothie


Gingery Roasted Beet and Sweet Potato Soup

Thursday, June 28, 2012

Cherry Orchards


Up until last week, the closest I had ever gotten to a cherry orchard was reading Anton Chekhov's masterpiece, The Cherry Orchard. And if you're familiar with that play, you know it doesn't end happily for the family or the cherry trees.

Thankfully, life is much happier in the state of Washington, especially the Leavenworth region, where scores of cherry orchards heavy with fruit line the highways. A fully fruited cherry tree is gorgeous — the clusters of cherries are dramatically suspended from branches, like firework starbursts.

Despite having eaten over three pounds of cherries in three days while we were in Washington, we're still craving them. So last night  I made Smashed Cherries, Amaretti and Ricotta, a delightful, no-cook summer dessert from Cheryl Sterman-Rule's new cookbook, Ripe: A Colorful Approach to Fruits and Vegetables. I had tested this recipe for Cheryl last year and have made it numerous times since. No doubt, you will too. 


If you'd like to learn more about Cheryl's book, then please see my full review at One For The Table, which also includes a tasty recipe for Radish and Olive Crostini. 


Smashed Cherries, Amaretti and Ricotta 
A no-cook summer dessert.
Serves 4
Printable recipe.

4 cups (1 to 1 1/4 pounds)
3/4 cup whole milk ricotta
2 teaspoon sugar
4 teaspoons milk
1/2 teaspoon almond extract
4 amaretti cookies
1 teaspoon cacao nibs or mini chocolate chips

Thwack the cherries with the flat side of a heavy knife so they flatten. Discard the pits. Divide the cherries among 4 pretty, clear glasses.

In a small bowl, stir together the ricotta, sugar, milk, and almond extract. Spoon pillows of ricotta over the cherries in equal proportions. Crumble one amaretti cookie over each serving and sprinkle with the cacao nibs. Serve immediately.

Tip: You'll find amaretti cookies (Italian macaroons) in larger supermarkets or Italian grocery stores, though you may substitute toasted, chopped almonds if you like.

Third photo credit: Photography © 2012 by Paulette Phlipot

Thursday, June 14, 2012

Minding My Peas and Mushrooms


I miss the way my grandmother used to say "mushrooms." It was "mushroonz" with a hard "n." I don't know why she pronounced it that way. Maybe it was a Rhode Island-Italian mash-up. Maybe it was just her.

When she was alive, I never missed an opportunity to remind her of it: "Hey, Nan, whatcha cooking over there? Some peas with mushroonz?" I'd say, suppressing a giggle. Invariably, she'd reply, "Ooh, you're so fresh." Then she'd make me sit down with her and eat some. Although I didn't like peas and mushrooms, I always liked Nan's, slick with butter and speckled with black pepper.

Even since Jeff and I moved away from Rhode Island 15 years ago, I've been cooking Nan's recipes — Italian chicken and escarole soup, Pizzelle Cookies, her famous Easter pies — and saying words like she did (well, only when I'm home). I'm not making fun of her. It's just the opposite: It's a way to remember her and talk about her.

The other night I had a pot of cooked fresh peas and mushrooms resting on the stove top. When Jeff came home from work, he walked straight to it, scooped a spoonful into his mouth, and said, "Mmmm.... good peas and mushroonz just like Nan's."

Yup, just like Nan's.

How about you? Did you grandmother or other loved one have funny ways of pronouncing words or doing things? I'd love to hear about them in the comment section below. 

Peas and Mushroonz (or Mushrooms)
Makes 4 servings
Printable recipe.

2 tablespoons butter
1 shallot, diced (about 1/4 cup)
1 (10-ounce) bag of sliced mushrooms
2 cups fresh peas (about 10 ounces)
Salt and freshly ground black pepper

1. In a large non-stick skillet over medium-high heat, melt butter. Add the shallots and cook 2 to 3 minutes, until soft and translucent. Add the mushrooms and cook 5 to 6 minutes or until lightly browned all over. Add the peas and cook 2 to 3 minutes, if you like them al dente like I do. If you prefer them softer, then cook them longer. Season generously with salt and freshly ground black pepper. Enjoy.

Since it's fresh pea season, here are more peas recipes you might enjoy:
Spring Pea Guacamole recipe from Everyday Southwest
Sweet Peas Hummus recipe from My Man's Belly
Orange Spiked Peas with Dill recipe from Food Blogga
Spring Pasta with Fresh Peas recipe from Arugula Files
Fresh Peas with Vegan "Bacon" recipe from May I Have that Recipe?
Warm Three Pea and Radish Salad recipe from Food Blogga
Creamy Minted Fresh Pea Almond Soup recipe from Healthy, Happy Life
Lemony Pasta with Fresh Peas, Ricotta and Mint recipe from Food Blogga
Spring Salad with Dandelion Greens, Asparagus and Fresh Peas recipe from Sass & Veracity

Tuesday, June 5, 2012

Thinking of Dad this Father's Day (Plus, a Give-Away)

As I was thinking of what to write about for a Father's Day post, I started to recall the times I talked about my dad on this blog. Turns out, it's a lot of times. So, rather than create a new story, I'm going to share some of the spark some good memories of you and your and dad. And, to dads everywhere, thanks, and Happy Father's Day.


There's a give-away too! 

In the comment section below, please share a fond memory of your dad. It can be sentimental, funny, quirky, food-related, sports-related, whatever. It's completely up to you! I'll choose 5 winners and mail them a signed copy of my book, Recipes Every Man Should Know

Deadline for entry is the end of the day, Sunday, June 10th so I can mail you the books in time for Father's Day on June 17.

Tweet about the contest, mentioning @Susan_Russo, and I'll count that as another entry. Good luck!


See a video of my dad trying to crack open a 14-pound crustacean. This is good viewing, folks.


My dad share's his perfect pepper biscuits for my Christmas cookie round-up.


My attempt at an intervention regarding my dad's obsession with stockpiling food. 


Dad + Jerry Lewis + bushels of peppers = Labor Day celebration


Buddy may be the Cake Boss. My dad is the Pizzelle Boss.


A story about my dad's overzealous appreciation to spaghetti squash.


Me: Wisdom teeth, pain. Dad: Shamrock Shakes. Lots of them. 


One of the first posts I had written on Food Blogga highlighted two of my dad's favorite things:
pizza and football.

Friday, May 25, 2012

Fire Up Your Imagination by Grilling Unusual Foods


Chances are good that you'll be firing up your grill this Memorial Day weekend, you and 71% of Americans. Chances are also good you'll be grilling hot dogs, hamburgers, steak and corn. But how about grilling some unusual suspects, like watermelon, sweet potatoes, even cake?

You can. Find out how in my latest article for the San Diego Union-Tribune, "Fire Up Your Imagination," which includes recipes for:

Italian-Inspired Grilled Pound Cake

Grilled Chipotle-Lime Sweet Potatoes

Smoky Grilled Guacamole

Spicy Grilled Watermelon, Cucumber and Jicama Salad, pictured below


What foods do you love to grill? Please share with us here or online at the U-T! 

Photo credit, FCC, mccun934.


Wednesday, May 16, 2012

How to Make Healthy, Homemade Veggie Chips


Curried Sweet Potato Chips

We know we need to eat more vegetables. The challenge is to do it with flavor and variety. So we've become creative.

Put all your vegetables in a blender, pulverize and serve. There's a booth at my local farmers market dispensing cups of green slop to devotees of that religion. I've tried it. I haven't converted.

Another approach is to chop up whatever you find in your vegetable drawer and put it on lettuce. This is more viable but looks and tastes an awful lot like salad, something that's been around for a while.

Or, take a mandoline to your vegetables, toss with olive oil and a dash of salt and serve them hot alongside a sandwich as chips. This vegetables-as-chips innovation has gone viral and can be found in grocery stores, restaurants and food trucks across the country. I've leapt onto this bandwagon with both feet.

Please click here to continue reading the post at NPR.org and to get recipes for Curried Sweet Potato Chips, Chili-Lime Plantain Chips, Kale Chips, Simple Salted Beet Chips and Smoked Paprika Carrot and Parsnip Chips.

Kale Chips

Sunday, May 13, 2012

Mother's Day 2012: Memories of Sunday Suppers with My Mom

Mom and Me, 2012


Sundays are for suppers. Not just any suppers. Suppers made patiently, slowly, lovingly. Like the way your mother or grandmother used to do.

When I was a child, most Sunday mornings were spent rolling the meatballs. From the time I about four years old, I’d stand on my mom’s rickety yellow step stool, and eagerly dig my hands into the cold pork and beef mixture she had waiting for me on the counter top. I’d add the eggs (yes, I was an egg-cracking prodigy), the bread crumbs, the parsley, the grated cheese, and I’d being to squish and mash the mixture with delight. That is, until my hands turned purple from the cold. Then my mom would run my hands under warm water, rubbing them with her own, before she’d let me start rolling the meatballs again.

Tuesday, April 24, 2012

Spring 2012 Fashion Trends: Color Block and Raw Beet Salads


According to Glamour magazine, one of this season's most wearable fashion trends is cheerful color block. Another colorful fashion trend is raw red beet salad. Wouldn't you love a dress this color?

Raw beets are nutrition powerhouses: They're packed with folate, fiber, potassium, and vitamin C. In this salad, they're tossed with protein and fiber-rich lentils and a zesty lemon vinaigrette, making it a satisfying and stylish vegetarian meal. If you really want to be cutting-edge, then make it vegan by omitting the feta cheese.

Raw Beet, Lentil, and Pistachio Salad
Makes 4 servings
Printable recipe.

2 large red beets, washed and peeled
2 cups cooked brown lentils
6 Kalamata olives, chopped
2 tablespoons crumbled feta cheese
2 tablespoons pistachio nuts
2 tablespoons olive oil
2 tablespoons red wine vinegar
2 teaspoons lemon juice
Zest of 1/2 lemon
1 tablespoon chopped fresh rosemary
Salt and black pepper, to taste

1. Using a cheese grater or a food processor with the appropriate attachment, shred beets. Place them in a medium bowl. Add cooked lentils, olives, feta, and nuts, and lightly toss.

2. In a separate bowl, whisk olive oil, vinegar, lemon juice, lemon zest, rosemary, salt, and black pepper. Pour over lentil-beet mixture. Serve at room temperature.

You might also enjoy these beet recipes:
Pickled Beets with Feta recipe from A Thought for Food
Chilled Corn and Golden Beet Soup recipe from No Recipes
Fresh Beet, Feta and Pistachio Salad recipe from Worth the Whisk
Warm Bulgur Salad with Beets, Fennel and Oranges recipe from Food Blogga
Red Rice Salad with Roasted Beets, Cherries and Nuts recipe from The Perfect Pantry

Friday, April 20, 2012

Espresso-Maple Pulled Pork and Egg Breakfast Burritos


Are you planning to go out for brunch this weekend? You may want to stay home and cook instead. Here's why: Espresso-Maple Pulled Pork and Egg Breakfast Burritos. Yes, they're as good as they sound.  Actually, better. The dark, roast-y espresso flavor contrasts deliciously with the sweetness of the maple syrup of the saltiness of the pork.

I suggest serving these pulled pork breakfast burritos with a mug a strong cowboy coffee or a colorful tequila sunrise. Whatever makes you happy. Cause isn't that what Sundays are all about?

Get the recipe here!

Thursday, March 29, 2012

How Do You Cook with Fennel?

fennel bulb

Cashier: Picking up the two fennel bulbs I was buying and examining them. "Do you cook with fennel a lot?"

Me: "Oh, yeah. All the time."

Cashier: "I’ve always wondered what to do with it. It just looks so cool, you know?"

Me: "Oh, I can give you lots of idea about how to cook with fennel. You could put it in salads or saute --"

Cashier: Waving the hands as if she were trying to stop traffic, she interrupted,  "Oh, no, no! I don't want you to tell me. I won’t actually do it. I’ve just always wondered."

In case you're wondering about fennel bulb, it's actually an herb that has been enjoyed since antiquity. When eaten raw, you'll appreciate its crunchy, refreshing celery-like texture and sweet licorice flavor. When sauteed or roasted, you'll find it morphs into something more savory, with an earthy depth of flavor. It gets along well with many ingredients but has a special affinity for citrus fruits, figs, olives, nuts, and hard cheese like Pecorino Romano and Parmesan. And those feathery fronds? They're edible too. Toss them in your salad or munch on them as a digestive aid.

So, tell me, dear readers, 
how do you cook with fennel? 

Lemony Roasted Fennel and String Beans

Lemony Roasted Fennel and String Beans
Makes 4 servings
Printable recipe.

1 fennel bulb, cut into 8 wedges
1/2 pound string beans, trimmed
1 tablespoon olive oil
The zest of 1/2 lemon (about 1/2 teaspoon)
The juice of 1/2 lemon (about 1 teaspoon)
1/4 teaspoon salt
1/4 teaspoon fresh black pepper
2 tablespoons chopped fresh flat-leaf parsley, divided

1. Preheat oven to 400 degrees F. Cut of fennel stalks. Cut bulb in half. Then in quarters, then in eights, for a total of 8 wedges. Place fennel and string beans in a large baking dish.

2. In a small bowl, whisk olive oil, lemon zest, lemon juice, salt, and pepper. Pour over vegetables and toss until coated. Cover tightly with tinfoil and bake for 10 minutes. Remove the tinfoil. Add 1 1/2 tablespoons parsley and toss. Cook uncovered for 15 to 20 minutes, or until vegetables are tender and a few brown spots appear.

3. Transfer vegetables to a platter or large bowl and drizzle with juices from the baking dish. Sprinkle with a little salt and freshly ground black pepper and remaining 1/2 tablespoon parsley.

You might also enjoy these fennel recipes: 

warm barley and fennel salad

Warm Barley and Fennel Salad recipe from Food Blogga (pictured above)

Apple, Fennel and Celery Salad recipe from Food Blogga

Shaved Fennel Salad recipe from 101 Cookbooks


Fennel, Pear, and Olive Salad recipe from The Perfect Pantry (pictured above)

Fresh Fig and Fennel Pizza recipe from Food Blogga

Roasted Zucchini and Fennel Soup recipe from Dianasaur Dishes


Pickled Fennel Agrodolce recipe from Hunter, Angler, Gardener, Cook (above)


Cheesy Chile, Fennel, and Potato Gratin recipe from What We're Eating

Monday, March 26, 2012

Share Your Easter Family Traditions and You Could Win an Easter Ham


Some of you may not know this, but in addition to writing Food Blogga, I also create content for Pork, Knife & Spoon, the blog of The National Pork Board.

Right now, we're gearing up for Easter by giving away coupons for TWO EASTER HAMS!

Want to win an Easter ham for your family? Do like bunnies do, and hop on over to Pork, Knife & Spoon to find out how!

The deadline for entering is this Wednesday, March 28, 2012 (midnight PST), so hurry! And good luck!

Thursday, March 15, 2012

eBook Review: In Conversation with Exceptional Women by Monica Bhide


Wouldn’t you cherish the opportunity to sit at a dinner table with Ruth Reichl, Dorie Greenspan, Susan Orlean, and Amanda Hesser? You can (sort of) when you read Monica Bhide’s ebook, In Conversation with Exceptional Women: Seeds of Inspiration to Help You Bloom Where You Are Planted.

Bhide, also exceptional, -- she’s an engineer-turned-renown cookbook author, writer, and mom of two -- interviewed 55 accomplished, inspirational women and compiled their insights in this notable ebook.

After posting several interviews on her blog, A Life of Spice, Bhide thought an ebook was the natural next step. So she reached out to women, who to varying degrees, had an impact on her life, including Top Chef host, Padma Lakshmi, award-winning author, Deborah Madison, and food blogging pioneer, Elise Bauer. You'll learn about their work patterns, their muses, their failings, and their successes. Some interviews are humorous, others poignant, all inspirational.

You could read this book at one sitting, on a lazy Sunday, but I wouldn’t recommend it. Take it one story at a time, perhaps with your morning coffee or afternoon tea. Savor the honesty, drink the wisdom. And remember, you’re exceptional.

Wednesday, March 7, 2012

Garlicky Roasted Red Pepper and Almond Dip Recipe

Garlicky Roasted Red Pepper and Almond Dip

"Back again?" (no smile)

That's the response I got from the cashier when I returned to my local market for the third time in three days.

"Wow, you must really love peppers." (eye roll)

That's what she said when I gently placed my nine red bell peppers on the conveyor belt. That's after having bought six the previous day and three before that, all with the same cashier. Does she ever go home?

I took umbrage neither to her eye rolling nor to her indelicate handling of my pristine peppers. If she doesn't realize the mind-blazing deal of red bell peppers 3 for $1, then I can't help her. I also won't be sharing my garlicky roasted red pepper and almond dip with her. So, there.

Garlicky Roasted Red Pepper and Almond Dip

This recipe is inspired by my friend Simona from the authentically Italian blog, Briciole. If you don't know Simona, then I suggest you visit her. You'll feel like you just spent some time under the Tuscan sun.

Garlicky Roasted Red Pepper and Almond Dip
Makes just over 1 cup.
Printable recipe.

1 1/2 tablespoons olive oil
1/2 teaspoon crushed red pepper flakes
2 garlic cloves, thinly sliced

1/2 cup blanched almonds, lightly toasted
1 1/4 cups drained roasted red peppers
2 teaspoons balsamic vinegar
A couple of pinches of salt

1. In a small pan over medium-low heat, warm olive oil. Add red pepper flakes and sliced garlic, and saute until golden and fragrant, about 3 minutes. Keep an eye on it, as it can burn quickly! Remove from heat.

2. Grind almonds in a food processor. Add garlic-oil, roasted red peppers, vinegar and a pinch of salt. Process until a thick sauce forms. Taste, and salt as desired. Cover and refrigerate, but bring to room temperature before serving.

You might also enjoy these red bell pepper appetizer recipes: 
Roasted Red Pepper and Walnut Spread recipe from Family Style Food
Roasted Red Pepper Dip with Feta and Mint recipe from Kalyn's Kitchen
Grilled Eggplant with Roasted Red Pepper Tapenade recipe from Food Blogga
Roasted Red Pepper and Garlic Hummus Crostini recipe from The Perfect Pantry
Mini Grilled Pizzas with Shrimp and Roasted Red Pepper Pesto recipe from Cookin Canuck

Tuesday, February 28, 2012

Forget the Caribbean. Just Give Me Some Black Beans and Rice

Caribbean black beans and rice

The other day I received a flyer advertising a romantic Caribbean get-away. It showed a scantily clad, deliriously happy couple lounging on the beach, cocktails in hand. I ripped it in half and tossed in the recycle bin.

When you're married to someone whose Twitter handle is @Dermdoc, lying on the beach isn't in your future. Consider this: Last summer when our local Target ran out of sunscreen, they called us.

So the only thing worth going to the Caribbean for would be the food. Caribbean food is a fusion of many cuisines including African, Ameri-Indian, French, and Spanish making, making it deliciously unique. Given its temperate climate, the Caribbean produces an astounding array of exotic fruits such as passionfruit, guava, cherimoyas, and coconuts which feature prominently in both sweet and savory dishes. And their beloved jerk seasoned meats and fresh fish, are often accompanied by two of my favorite foods: plantains and black beans.

Caribbean black beans and rice. If you've never had it, I'm sorry; you've been missing out. I had my first taste about 12 years ago in an eclectic Caribbean restaurant in Asheville, North Carolina. I was smitten and still am.

What makes Caribbean black beans so good? They're flavored with an enticing combination of ingredients including refreshing ginger, sweet pineapple and orange juice, aromatic allspice, and savory thyme. Spooning Caribbean black beans atop a bowl of white or brown rice makes a happy, humble vegetarian dish that you'll find yourself returning to again and again. And if you'd like to add some protein, may I suggest some pan-seared chili-lime shrimp?

Caribbean Black Beans and Rice
Serves 4
Printable recipe.

1 cup white or brown rice of your choice
3 cups water
2 teaspoons extra virgin olive oil
2 small garlic cloves, minced
1 medium white onion, finely chopped (about 1 cup)
1 (14-ounce) can black beans, drained
1/4 cup pineapple juice
1/3 cup orange juice
1 teaspoon orange zest
1 teaspoon freshly minced ginger
1/4 to 1/2 teaspoon cayenne pepper, depending on how hot you like it
1/8 teaspoon allspice or nutmeg
2 teaspoons fresh thyme

1. In a medium heavy saucepan over high heat, bring rice and water to a boil for 2 minutes. Reduce heat to low, partially cover, and cook until water is absorbed and rice is tender, about 20 minutes.

2. In a medium pot over medium heat, saute garlic and onions in olive oil until fragrant and lightly browned, about 3 to 5 minutes. Add remaining ingredients, and stir until combined. Cook over low heat until heated through, about 8 to10 minutes. If beans become too thick, simply add a little bit more juice or water. Serve atop white or brown rice.

Optional garnishes: Chopped ripe mango or diced fresh pineapple.

You might also like these Caribbean-inspired recipes:
Slow Cooker Caribbean Jerk Chicken recipe from A Year of Slow Cooking
Caribbean Style Black Bean and Delicata Squash recipe from Lisa's Kitchen
Caribbean-Style Steamed Cabbage and Carrots recipe from Coffee and Vanilla
Bluebeard's Rum Custard Pudding recipe from Trini Gourmet

Tuesday, February 21, 2012

Waiting on Winter Squash

spaghetti squash

I wanted kabocha squash. You don't always get want you want.

The other morning when I walked to the squash section of my local supermarket, it was practically empty, well, except for the tiny area where the produce guy was rearranging the spaghetti squash. 

"Hey, do you have any kabocha squash in the back?" I asked. 

"Sorry, we didn't get any kabocha squash in this week, but we do have spaghetti squash," he said, and held one out to me, with an expectant smile.

"How about butternut squash?"

"No, the truck hasn't come in yet."

"Acorn?"

"Nope."

"You know, that spaghetti squash looks really good," I said. 

"Doesn't it?" he replied, and handed me the squash.

Though I'm committed to eating more kabocha squash this year, there's nothing wrong with giving spaghetti squash a little love. Or shall I say, "amore"? Because spaghetti squash needs Italian love -- grassy extra virgin olive oil, fragrant rosemary and basil, and salty Parmesan. Mangia!

Herbed Spaghetti Squash with Olive Oil and Parmesan

Herbed Spaghetti Squash with Olive Oil and Parmesan
Serves 4 to 6

1 spaghetti squash (about 3 1/2- 4 pounds)
2 tablespoons olive oil, divided (preferably extra virgin for drizzling on top)
1 garlic clove, minced
3/4 cup chopped fresh herbs such as basil, parsley, rosemary, and oregano
1/4 teaspoon crushed red pepper flakes
1/4 teaspoon salt
3/4 cup grated Parmesan cheese, divided

1. Preheat oven to 375 degrees F. Line a baking pan with tinfoil (for easy clean up). Place squash halves flesh side down and pierce all over with a fork. Cook for 45-50 minutes, or until tender. Let cool. Using a fork, scrape the hot flesh from the squash and place in a bowl.

2.  In a large skillet over medium-high heat, warm the olive oil. Add the garlic and cook until just fragrant. Add the herbs, crushed red pepper, salt, and 1/4 cup grated cheese, and stir. Pour over the cooked squash and stir well. Place in a serving dish. Drizzle with remaining 1 tablespoon olive oil (preferably extra virgin) and sprinkle with remaining 1/2 cup grated cheese. Serve hot.

You might also enjoy these spaghetti squash recipes:
Baked Spaghetti Squash with Butter and Cheese recipe from Food Blogga
Spaghetti Squash Gratin with Walnuts and Bacon recipe from Teacher Cooks
Spaghetti Squash with Roasted Brussels Sprouts & Chickpeas recipe from Fat Free Vegan
Spaghetti Squash with Spinach, Feta, and Basil White Beans recipe from Cookin' Canuck

The Winner of Parents Need to Eat Too Is....

Danielle. I hope your sister enjoys the book, Danielle. Please email me your name and mailing address so we can send you the book.

Thank you so much to all of you who commented and tweeted about the give-away. There will be many more give-aways, so better luck next time!

-Susan

Thursday, February 16, 2012

Cookbook Review: Parents Need to Eat Too by Debbie Koening

While most moms spend their entire pregnancy worrying about how and what to feed their newborn, they often neglect themselves. While baby is fortified with breast milk and organic mashed veggies, mom has the number of the nearby Domino's memorized.

Lucky for new moms and dads, there's Debbie Koenig, proud mom of 5-year-old Harry, and author of the remarkably useful new cookbook, Parents Need to Eat Too.

The idea for the book grew organically from Koenig's own life. As a sleep-deprived new mom, she found herself resorting to too many fried egg sandwiches and Clif bars instead of nutritious homemade meals. So she started making a few changes: During Harry's morning and afternoon naps, she'd chop and roast vegetables or whip together a cheese or tomato sauce so that when dinnertime came, she'd be way ahead of the game. Miraculously, it worked! So well, that you're now reading this review of her cookbook.

Parents Need to Eat Too has over 150 delicious, nutritious, easy-to-make recipes divided into creative chapters including "Nap-Time Cooking, "Un-Recipes for Partners Who Can't Cook," and "Galacta-what? Recipes to Support Breastfeeding." It also gives new moms tips on how to stock her pantry, which cooking tools and gadgets to buy, and how to shop with a baby.

In the "New Mom's Pantry" chapter you''ll find lots of satisfying, simple, one-pot wonders and pasta dishes such as Smoky Split-Pea Soup (perfect for baby food), Spaghetti Alla Puttanesca, and Southwestern Polenta Lasagna.

"Nap-Time Cooking" will no doubt be the most popular among most new moms. Once the baby's asleep, Koening helps you dice and slice like a pro. You'll find recipes for Zucchini and Spinach Risotto, Indian-Spiced Black Lentil Stew, and more.

And on those days when Sweet Pea won't stop crying, and you have to carry him around all day, Koening even has a tasty selection of "One-Handed Meals," including Chicken (Pot) Handpies, Meat Pasties, and BBQ Chicken Empanadas.

You still wonder, Will the recipes really work? Yes. How do I know this? Because the recipes were tested by a group of more than 100 parents! Indeed, you'll appreciate (and sometimes chuckle at) the "Mama said" section at the end of each recipe that includes a note from a parent who made the recipe. Conveniently, every recipe also has instructions to make baby food from the same ingredients.

If it seems that Koening has anticipated all of your new-parent eating dilemmas and come up with tasty solutions for you, it's because she has. It's called Parents Need to Eat Too, and if you click here, you can watch of video of Debbie Koening telling you more about it.

There's more! If you order the book before February 21st, you'll receive a FREE Digital Starter Kit with bonus recipes, a guide to making baby food, a bookmark, and more.

Give-Away Time!

In the comment section below, tell me why you'd like to win a copy of Parents Need to Eat Too. Tweet about it and mention @Susan_Russo, and I'll count that as another entry. I'll announce the winner on Monday, February 20th. Good luck!

Monday, February 13, 2012

30 Days, 30 Ways with Macaroni and Cheese

Salami, Spinach, and Smoked Gouda Macaroni & Cheese
                   Salami, Spinach, and Smoked Gouda Macaroni and Cheese

You never know where recipe inspiration may come from.

A few Sundays ago as I was trying to think of a new macaroni and cheese recipe, I was stuck. I knew I was going to use Wisconsin Smoked Gouda Cheese, but as for everything else, I just didn’t know. Did I want a Tex-Mex mac ‘n cheese with charred poblanos? Or how about a hog-wild American version with bacon and caramelized onions?

So I did what any good recipe developer would do: I started watching the Packers/Giants playoff game. Green Bay had just fumbled the ball, and the Giants recovered it. And I exclaimed, “That’s it!”

Click here to find out what happened next and to get the recipe for Salami, Spinach, and Smoked Gouda Macaroni and Cheese.

For 29 more amazing macaroni and cheese recipes from some of the best food bloggers out there, please visit The 3rd Annual 30 Days, 30 Ways with Macaroni and Cheese web site, sponsored by the Wisconsin Milk Marketing Board.

Tuesday, February 7, 2012

The Secret to Amazing French Onion Soup

brandied French onion and fennel soup

You know what the secret to amazing French onion soup is? Brandy.

brandy bottle

Next time you make French onion soup, skip the white wine and add brandy instead. You won't taste a strong liquor flavor, but you will notice a complexity and depth of flavor that lingers delicately on your lips.

Brandied French Onion and Fennel Soup
Makes 8 servings
Printable recipe.

Note: The licorice flavored fennel complements the sweet onions and brandy in this soup. If you're not a fennel fan, then add 2 more onions. For a variation, you can also use smoked Gouda or rye bread.

1/2 cup unsalted butter
2 medium fennel bulbs, finely chopped, about 1 1/2 pounds
5 medium yellow onions, thinly sliced, about 2 pounds
1 cup brandy of your choice
7 cups beef broth
1 teaspoon salt
1 teaspoon freshly ground black pepper
2 to 3 teaspoons minced fresh thyme, depending on your likeness
3/4 pound shredded Gruyere cheese
8 thin slices of French bread, toasted

1. In a large, heavy bottomed saucepan or Dutch oven over medium-low heat, melt butter. Add fennel and onions turning to coat. Cook for 35 to 45 minutes, stirring occasionally. This allows the onions to "sweat" and become meltingly tender, browned, and sweet. Add brandy and cook for 5 minutes until slightly reduced. Add beef broth, salt, black pepper, and thyme and stir. Reduce heat to low and cook for 15 to 20 minutes.

2. Pour soup into individual bowls. Top each with a piece of bread, toasted side down, and top with 1/8 of the shredded cheese. Broil for 2 to 3 minutes, or until browned and bubbly. Serve immediately.

You might also enjoy these onion soup recipes: 
English Onion Soup recipe from Never Enough Thyme
Beef and Onion Soup recipe from The Food in My Beard
Italian Onion Soup recipe from Ms. Adventures in Italy
English Onion Soup with Sage and Cheddar recipe from Erin Cooks

Monday, January 30, 2012

Santa Maria-Style Barbecue

Cowboy # 5

Barbecue. You know what it means, right? Are you sure? Having grown up in Rhode Island I always thought a "barbecue" referred to an outdoor cookout featuring grilled hot dogs and hamburgers. It wasn't until we moved to North Carolina that we discovered "barbecue" had nothing to do with hot dogs and hamburgers and everything to do with slowly cooking a whole hog over some flames.

tri-tip roast

Now that we live in Southern California, I've fallen for Santa Maria-style barbecue made from tri-tip, a flavorful, triangular cut of beef from the bottom sirloin.

Santa Maria-style barbecue originated in the Santa Maria Valley in Central California in the 19th century. After cattle round-ups, American cowboys, known as vaqueros, would host huge gatherings that featured beef skewered and cooked over a red oak fire. The beef was simply seasoned with salt and pepper and served with Pinquito beans, salsa, bread, and simple desserts. It hasn't changed much in almost two centuries.

tri-tip with dry rub

So when my local supermarket had tri-tip roast on sale recently, I bought one, then I came home and emailed my friend Joe (@steakperfection on Twitter) for a recipe. A beef aficiando, I knew Joe would have a tried-and-true tri-tip recipe; I didn't know that he'd kindly take the time to write remarkably detailed instructions for me. (Thank you, Joe!)

Below is Joe’s recipe and instructions for his authentic Santa Maria-style tri-tip. It’s long, but just read it through first before doing anything, and you’ll see, it’s really not complicated, just very detailed, and oh-so-worth the effort. The finished tri-tip is unabashedly rich, tender, and juicy.

And just in case you're wondering, tri-tip tastes better if it you eat it while wearing a cowboy hat.

rare tri-tip

Santa-Maria Style Barbecue from Joe 
Serves 6 to 8
Printable recipe.

Ingredients:

A very well-marbled tri-tip roast, 2 to 3 pounds
Inexpensive vegetable oil
Garlic powder, not garlic salt (or raw garlic)
Black pepper, coarsely ground
Kosher (big-grain) salt

Equipment:

A corning bowl big enough to lay the tri-tip in and season
Tongs
An instant-read thermometer (or two is better)
A rack (like a cookie rack) over a cooking sheet, where you'll let your tri-tip rest for 5 minutes after cooking
Aluminum foil to cover the tri-tip when it's cooked
A non-carbon knife (ceramic is best) for slicing the tri-tip before serving (carbon imparts a metallic taste)

Preparation:

Did you remember to fill your grill's gas tank?  Hope so . . .

20 to 30 minutes before you want to start cooking, clean the grill, turn the temperature to its highest settings, and close the lid. If possible, it should reach 750F at grill level. You can tell without an infrared thermometer by doing this: if you can put your hand 3" above the grill and count to 3, it's not hot enough.

Remove all layers of fat, fat chunks, and silver-skin from the tri-tip.  Make sure to remove the fat from the pocket on the short side of the triangle. When removed, there will be a deep pocket there.  Discard the fat (or use it for tallow). The only visible fat remaining will be tiny specks and streaks of fat, which are too small to trim and which will melt quickly on the fire.

Dry the tri-tip with paper towels (including inside the pocket). Bring it to room temperature. If you're doing this alone, use one hand (I use my left) to get "dirty" holding the tri-tip and rubbing in the rub, and use the other hand (I use my right) to pour on the ingredients.

Before you start, take the tops off the oil, salt, garlic and pepper containers (remember you'll have only one hand, once you start). Place the tri-tip into a corning or glass bowl with 2" edges. We'll first season one side of the tri-tip, then flip it over to do the other side. Ready, set, go -

(a)  Pour a thin layer of vegetable oil on the outside and into the pocket of the tri-tip.  Then rub it all over fairly evenly (with the 'dirty' hand). The only purpose of the oil is to make sure that the seasonings stick.

(b)  Next, pour a very thick layer of garlic powder on the top. (If you're using fresh garlic, rub in several cloves of fresh garlic all over, leaving a thick layer of paste.) The tri-tip should be almost completely yellow with the garlic powder.

(c)  Now pour lots and lots of black pepper on the tri-tip. Rub it in gently (so that it coats the tri-tip). If the pepper begins to fall off, pour a little more oil into your 'dirty' hand, and "pat" the oil onto the tri-tip, so that the pepper sticks. If you've used enough garlic powder and pepper, there will be one or two tablespoons extra in the bottom of the dish. The tri-tip should be almost completely black with the pepper.

(d)  Finally, you're ready for the Kosher salt.  Usually, I have to add more oil at this point, so that the salt will stick. Add lots of salt, so that the surface is white with lots of black-pepper highlights and the occasional yellow background. The idea is to create a thick layer of seasoning on the outside of the tri-tip, that will create an exterior with a dry, crunchy texture and intense flavor profile, to contrast with the lush, beefy, juicy interior.

Now use your 'dirty' hand to flip over the tri-tip, and repeat the process from (a) through (d). There is usually enough seasoning in the bottom of the pan to start the second side, but you'll probably have to add more of each. Again, don't forget to season the pocket and the three edges of the triangular tri-tip.

If you want, you can cover and hold the tri-tip for 2 hours before cooking. (If you need longer, refrigerate it.)

I'll assume that your grill temperature is almost 750F, that the outside temp is around 70F, and that there is no huge humidity or breezes/winds. (All three affect cooking time.)

When you're ready to start grilling ready, set your iPhone's (or your kitchen) timer for two minutes. You're going to flip the tri-tip from one side to the other every two minutes during the cooking process. Put the tri-tip on the grill (use tongs, not a fork, to prevent loss of juices) and close the lid as fast as possible. Start your timer. Don't peek. After two minutes, quickly open the grill, flip the tri-tip and close the lid. Continue to do this for a TOTAL of 8 minutes (rare - my fav) or 10 minutes (med-rare). If your grill isn't hot enough (I'll bet it isn't), the tri-tip will take up to twice as long.  Use an instant read thermometer (or two of them, which is better in case one if off - just average the two thermometers) to tell when the tri-tip is done. Take it off at 115 (rare) or 125 (med rare), measured in the middle of the tri-tip  Insert the thermometer(s) from the side of the tri-tip, so that they go into the center. Put the cooked tri-tip onto the rack, and cover it with a "tent" of aluminum foil. The goal: don't let the foil touch the tri-tip, because you don't want to lose that exterior crust that you worked so hard to create.

Let it rest for 5 entire minutes. (This will total about 7 minutes by the time you start slicing:  that's a good thing.) Now move the tri-tip to your cutting board. Using a very sharp knife, cut slices about 1/8" thick (i.e. thin) across the grain.  The tri-tip has a strange grain structure -- hard to explain, but you'll know it when you see it. You'll be cutting almost perpendicular at the point of the triangle and then angle in more and more as you reach the middle of the triangle. Watch for the meat grain, and you won't have any problem. If your cutting board has a little juice from the cutting, dribble it only your serving platter.

For more information about steak, visit www. SteakPerfection.com.

Top photo credit: FCC, randy pertiet. Remaining photos, Susan Russo.

Monday, January 23, 2012

Balsamic Roasted Cippoline Onions from Frieda's, Inc.

balsamic roasted cippolini onions

Onions have their place. I wouldn't dream of starting a marinara sauce without sauteed shallots. Nearly every soup I make starts with sauteed brown onions. Red onions enliven fruit salsas, and scallions add depth to guacamole. And let's face it, a bratwurst without grilled Vidalia onions is a crime.

What about cippoline onions? Believe it or not, they've never even visited my kitchen, that is, until a few weeks ago. Now, they're nestled in the onion basket alongside my beloved shallots and brown onions.

Why this sudden change of heart toward cippoline onions? It's because of Frieda.  I'm unable to resist her charms, and if you taste her cippoline onions, you'll find yourself equally captivated.

These cippoline onions are from Frieda's Inc., The Specialty Produce People. I've had the pleasure to do some recipe development with Frieda's and have tasted many of their products from onions and potatoes to pine nuts and dried cranberries. The cippoline onions are wonderful.

Cippoline onions which look like little flying saucers are naturally sweeter than most onions, and roasting them only enhances their sweetness. In the recipe below, the contrasting flavors of tangy vinegar and sweet sugar add depth of flavor while the fresh rosemary lends fragrance and earthiness. Serve these balsamic roasted cippoline onions with roasted pork tenderloin, grilled steak or chicken, or even a bowl of wild rice for a hearty vegetarian entree.

Then make some room in your onion bowl for the cippoline onions you'll be buying next time you're at the supermarket.

Balsamic Roasted Cippoline Onions
Makes 4 servings
Printable recipe.

1 pound cippolini onions, preferably from Frieda's Inc.
1 tablespoon olive oil
3 tablespoons balsamic vinegar
1 teaspoon light brown sugar
1/2 tablespoon finely chopped fresh rosemary
A couple of pinches of salt and freshly ground black pepper

1. Position a rack in the center of the oven and preheat to 350 degrees F.

2. To easily remove the onion skins, cut a small x in the bottom of each onion. Place onions in a pot of boiling water for 2 minutes. Drain and plunge in a bowl of cold water for 2 minutes. Then the skins will easily slide off with even the gentlest nudge. Scouts honor. Place onions in a large glass or ceramic baking dish.

3. In a small bowl, whisk olive oil, balsamic, brown sugar, rosemary, salt, and pepper.  Pour over onions and toss to coat. Cook 40 to 45 minutes, turning a couple of times, until the onions are browned and tender and the sauce thickens and becomes bubbly.

You might also enjoy these cippoline onion recipes:
Five Onion Confit recipe from Sass & Veracity
Pickled Cippolini Onions recipe from A Jersey Girl in Portland
Roasted Brussels Sprouts &  Cippolini Onions recipe from Gluten Free For Good

Monday, January 16, 2012

Chipotle Chili Butternut Squash Soup is Hot

chipotle chili butternut squash soup

I'm not exactly sure when it happened, but at some point in the last several years, ginger butternut squash soup became America's #1 vegetarian soup of choice.

Ginger butternut squash soup is everywhere. Google it, and you'll get hundreds of recipes (I stopped counting after the eighth full page load). Every vegetarian cookbook has a recipe for it. It's the go-to soup for Thanksgiving holidays and dinner parties, and 9 times out of 10, it's the only vegetarian soup available at cafeterias and supermarkets food courts. I've seen brawls break out in Trader Joe's as people frantically try to scoop up as many cartons of butternut squash soup as possible.

I understand the love. I made my first pot of ginger butternut squash soup about 15 years ago from a vegetarian cookbook I bought right after we moved to North Carolina. It was a revelation: creamy, refreshing, soothing. I have made that soup so many times, the recipe is etched in my brain along with my telephone number and birth date.

chipotle chilis in adobo sauce

Yet, my love has grown weary. I'm tired of ginger butternut squash soup. I need something bolder, zestier, hotter! So for today's butternut squash soup recipe, I swapped my gentle ginger for assertive chipotle chilis in adobo sauce. Smoky, fiery chipotle chilis are the perfect antidote to boring butternut squash soup. With cilantro, onions, and cumin, this soup has a decidedly southwest flair, so I won't need to tell you that big hunks of warm, buttery cornbread are the only accompaniment it needs.

How about you? Doing anything different with butternut squash soup lately?

Chipotle Chili Butternut Squash Soup
Serves 6-8
Printable recipe.

Chipotle chilis in adobo sauce can be found in the Mexican food section of most major supermarkets or at specialty Mexican markets.

1 (1 1/2-2 pound) butternut squash (about 4 cups cooked)
2 tablespoons olive oil, divided, plus a little for brushing the squash
1 yellow onion, diced (about 1 cup)
3 celery stalks, chopped (about 1 cup)
2 carrots, peeled and chopped (about 1 cup)
4 cups low-sodium vegetable broth
2 tablespoons chopped chipotle chilis in adobo sauce, (about 2 chilis tablespoon)
1/2 teaspoon ground cumin
3/4 cup chopped fresh cilantro

1. Position a rack in the center of the oven, and preheat to 400 degrees F. Slice butternut squash in half. Scoop out the seeds and discard. Brush the flesh with a little bit of olive oil. Roast flesh side down on an aluminum foil-lined baking sheet for 40-45 minutes or until tender when pierced with a fork. Let cool slightly before scooping out flesh. Discard skin.

2. In a deep pot over medium-high heat, warm oil. Saute onions, celery and carrots for 5 to 7 minutes, or until softened and lightly browned. Add the cooked squash and broth. Bring to a boil, then reduce to low, and cook for 5 to 7 minutes. Add chilis, cumin, and cilantro. Turn off heat, and let cool 10 minutes before pureeing. Taste it. If you’d like it spicier, then add more chilis.

3. Working in batches, puree the soup in a blender until smooth, and return to the pot over low heat. Stir occasionally until the soup is thoroughly heated, about 10 minutes. If you prefer it thinner, then add a bit more broth or warm water, and stir well. Season with salt and pepper as desired. Garnish individual servings with fresh cilantro, if desired.

You might also like these recipes featuring chipotle chilis in adobo sauce:
Sweet Chipotle Glazed Baby Back Ribs recipe from Sippity Sup!
Chipotle Turkey, Black Bean, and Corn Soup recipe from Soup Chick
Healthy Chipotle Chicken Chili with Spiced Tortillas recipe from Food Blogga
Beef Enchiladas with Chipotle-Pasilla Chili Gravy recipe from Homesick Texan