Friday, May 16, 2008

A Pineapple Chutney that June Cleaver Would be Proud Of

I've never been one for canning, jarring, or preserving. So when Pixie and Rosie announced their Putting Up Event, I thought, Yes! Now I have a reason to make homemade jam.

I immediately began jotting down essentials I would need, like gelatin and old-fashioned Ball glass jars. I had visions of myself in a 1950's full-skirted dress, spotless white linen half apron, and pearl necklace and heels. I was going to be sooo June Cleaver.

june cleaver

Then I double checked the event and saw that they would accept chutney as well, which doesn't need gelatin, special jars, heels, or pearls to make properly. So I made this simple savory chutney instead.

Chutneys are sweet and spicy condiments, which are remarkably versatile. Thanks to dear Deeba, I now know chutney derives from the East Indian word chatni, which is Hindi for "to crush." That's because chutneys are often made by crushing the ingredients together with a stone.

I like sweet and sour chutneys, which often get their sweetness from fruit and sugar and their sourness from vinegar.
Ingredients are simply mixed together and simmered slowly until the sugar bubbles up and thickens, creating a jam-like sauce. They're generally cooled before being eaten and can last for at least a couple of weeks in the refrigerator.

My two favorite chutneys are this mouth-puckeringly tangy kumquat and dried cherry chutney that I made several times this past winter, and today's fresh pineapple chutney. I know I'd also like Deeba's delicious spicy coriander-mint chutney.

Sweet pineapple and raisins balance the sour vinegar, hot chili, and fragrant spices of this aromatic and bold chutney. It's especially tasty with grilled shrimp but also pairs well with tofu and pork; or you could just enjoy it with some freshly baked Naan or warm pitas.

Now if only I could find my silk sari ....
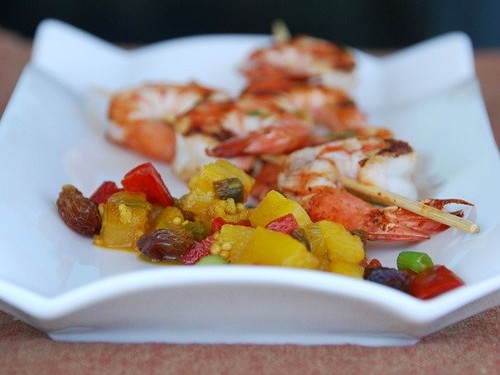
pineapple chutney skewers

Grilled Shrimp Skewers with Fresh Pineapple Chutney

Yields approximately 1 1/2 cups
Makes 4 entree or 8 appetizer servings
Print recipe only here.

Marinade:

24 extra large or jumbo shrimp, cleaned and deveined
1 tablespoon sesame oil
3 tablespoons low-sodium soy sauce
juice of 1/2 lime
1/2 teaspoon cumin
1/2 teaspoon cayenne pepper

Chutney:
1 teaspoon canola oil
2 green onions, thinly sliced (about 1/4 cup)
1 red bell pepper, diced (about 1 cup)
1 serrano chili, minced with some seeds
2 cups fresh pineapple, diced
1/4 cup golden raisins
3 tablespoons apple cider vinegar
1/2 cup white sugar
1/2 cup brown sugar
1/2 cup orange juice
1 1/2 tablespoons fresh ginger, minced
1/2 teaspoon ground coriander
1/2 teaspoon mustard seeds
1/4 teaspoon ground cinnamon
salt, to taste
1 tablespoon fresh cilantro, finely chopped

To make the marinade, whisk all ingredients in a bowl. Pour into either a large Ziploc bag or a plastic container. Add the shrimp, shaking well. Refrigerate for at least 30 minutes or up to 1 hour.

To make the chutney, mix all ingredients from apple cider vinegar through ground cinnamon in a small bowl and set aside. Heat canola oil in a medium pot over medium-high heat. Saute green onions and red peppers for 3 minutes, or until slightly softened. Add chili, pineapple, and raisins, cooking for an additional 2-3 minutes. Add the vinegar mixture to the pot; bring to a boil. Reduce heat to medium-low; simmer uncovered, until thick and reduced, about 35-45 minutes. Once cooked, stir in fresh cilantro, and season with salt, to taste. Allow to cool before serving. (This chutney will keep for up to 2 weeks if refrigerated in an airtight container.)

Remove the shrimp from the marinade; place 3 shrimp per skewer. Grill for 2 minutes, flipping once, or until the meat is opaque and the outside is lightly charred.

You might also like:

Lamb Kebabs with Minted Cucumber Chutney


Shrimp Tacos with Citrus-Avocado Salsa


Goat Cheese and Poblano Quesadillas with Pineapple-Mango-Habanero Salsa


Save This Page on Del.icio.us

Wednesday, May 14, 2008

Exercise Helps Osteoporosis

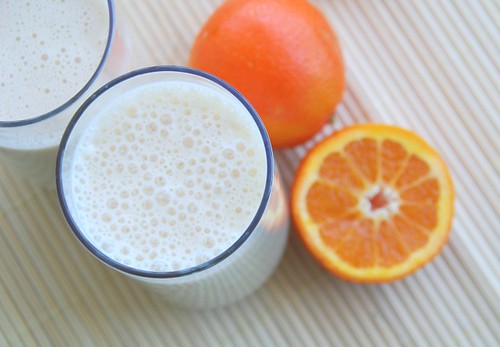
creamsicle smoothie two glasses
Creamsicle Power Smoothie


Today's post is guest written by Exercise Blogga (Food Blogga's alter ego).

Good Morning! Did everybody have breakfast? Good.
Did everybody exercise? What? Why not? Don't you know:
  • Exercise reduces your risk of cardiovascular disease, high blood pressure, Type 2 diabetes, and several cancers.
  • Exercise helps you control your weight, improve your metabolism, and build muscle and bone strength to combat osteoporosis.
  • Exercise alleviates stress, builds self-esteem, and helps you get a better night's sleep.
  • Exercise will also make you look better in your bikini this summer. (Now have I got your attention?)
Exercise helps prevent osteoporosis (and helps maintain bone once you have the condition). According to the National Osteoporosis Foundation, the best exercise plan for building and maintaining bone mass and density is a combination of weight bearing exercise and resistance training.

Weight bearing exercise
refers to exercise in which your feet and legs are "bearing your weight," and your bones and muscles are working against gravity. Walking, jogging, and stair climbing are examples.

Resistance exercises refer to strength training such as Nautilus equipment or free weights (hand-held weights).

Of course, you should talk to your doctor before starting any exercise routine, especially if you have had bone fractures or have been diagnosed with osteoporosis.

For every positive reason to exercise, there are reasons not to, such as: I don't have the time, or I feel stupid going to a gym. Maybe I can help. I've been doing strength training and cardio 6 days a week at a gym for years now, and I love it. I didn't love it when I started, so here are my 7 personal tips for starting and maintaining a regular exercise program:
  1. Be realistic. You will fail if you set yourself up to fail. But you will succeed if you set achievable goals. Start slowly--perhaps 2-3 days a week.
  2. Be patient. Did you know it takes your brain about 3 weeks to develop a habit? That means if you can stick with an exercise plan for 3 weeks, the chances are pretty good you'll keep exercising.
  3. Select days and times you want to exercise and schedule it in just like you would any other important appointment.
  4. Resist giving in to the "I don't feel like exercising" feeling. Ask yourself, "What am I going to do instead?" If it isn't much better, then go work out, even it's just for 20 or 30 minutes.
  5. Do exercises you enjoy. If you hate running, then walk briskly. You'll be more likely to stick with it if you like it. Remember, however, that it's important to challenge your body with different exercises, so maybe 1 or 2 times a week, try something new like a spinning class or a few laps in the pool.
  6. Begin weight training with Nautilus equipment or free weights. Resistance training builds bone and muscle mass, makes you stronger, improves your metabolism, and helps burn fat even when you're not exercising.
    • If you're a gym newbie, then consider hiring a trainer for 4 or 5 sessions to teach you the basics (many gyms offer this free with membership).
    • Subscribe to a fitness magazine such as Women's Health or Muscle and Fitness, Hers.
    • Believe me when I tell you, ladies, "You won't bulk up." You'd have to work out several hours every day, eat nothing but egg whites and plain fish, and have enough testosterone to grow a beard. I swear.
7. Reward yourself when you reach a goal. Instead of treating yourself to food like ice cream which could un-do all of your hard work, consider buying a new workout outfit or CD you'd like to listen to while working out.

Eating well is an important part of any exercise plan, and protein drinks are a simple, healthy pre- or post-workout meal. Most protein smoothies are made with whey protein because it stimulates muscle growth and aids in recovery. If you're lactose-intolerant (like I am), then whey isn't an option since it's a by-proudct of cow's milk cheese.

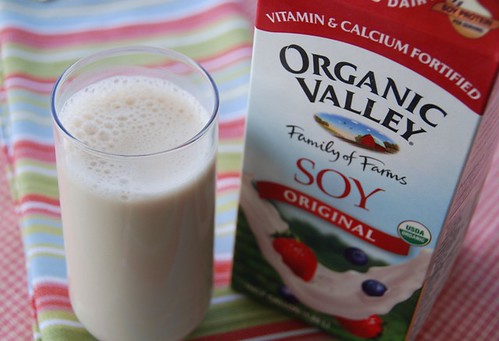
soy milk

I use soy protein instead; it contains all nine essential amino acids making it a “complete protein," and helps meet your body’s needs in regards to building and maintaining muscle. Also, soy protein contains isoflavones which aid the body’s absorption of calcium into bones and has been linked to a decrease in osteoporosis.

Soy protein is easily digestible and virtually tasteless (though flavored varieties are available). It is widely available at health food stores and organic markets such as Whole Foods. So why not give it a try?

Want to send a calcium-rich entry to Beautiful Bones, my osteoporosis food event? Then click here for full details. And many thanks to all of you who have already submitted recipes. There is an inspiring array of calcium-rich breakfasts, main meals, and desserts, and every one is fabulous!

This refreshing smoothie will cool you right off after a hard work out.

Creamsicle Power Smoothie
Makes 1 serving
Print recipe only here.

1/2 cup soy milk** or skim milk
1/2 cup calcium-fortified orange juice
1/2 large banana
3 tablespoons soy protein powder
1 teaspoon sugar, Stevia, or Splenda
1/4 cup ice cubes

Place all ingredients in a blender and blend on high for 10-15 seconds until frothy. If you like it thinner, then simply add a little bit of water.

Of course, smoothies are endlessly versatile. So use any combination of milk, juice, yogurt, and/or fruit you prefer.

**I prefer both Organic Valley brand soy milk and Silk brand Soy Milk. Both are high in calcium and protein and taste great.


You might also like these dishes for a post-workout meal. They contain lean protein and complex carbs, which replenish your muscles after a hard workout.

Breakfast Egg Sandwich with Avocado and Chipotle-Mayo


Heuvos Rancheros with Salsa Verde


Swordfish with Pineapple-Mango Salsa


Save This Page on Del.icio.us

Sunday, May 11, 2008

Do you tofu? I do.

string beans and tofu in Thai peanut butter sauce

Tofu. Is there another food so misunderstood, so unjustly maligned?

Some people don't simply dislike tofu, they hate it. Why? Here's my theory about tofu antipathy: It's not the taste (there isn't any; it takes on the flavors of other ingredients), or the texture (there are many different ones to choose from), or the price (it's not expensive).

It's because of Tofurky.

Tofurky is a mock-turkey eaten as a vegetarian alternative to turkey. Look at it. Does that look like turkey to you? I mean, it actually comes in a box.

Of course, with a little creativity, you could make it look more like a turkey.

I guess it's not only Tofurky, though; it's all those meat wanna-be tofu products that have ruined it for tofu. What's the point of tofu sausage or tofu bacon? They aren't fooling anyone.

These imposters have made it too easy to poke fun at tofu and dismiss it as "weird." It's not. It's good. Really. And good for you too. Tofu is rich in calcium, protein, iron, and isoflavones, which may help prevent osteoporosis as well as preserve already osteoporotic bones.

If you're a tofu newbie, then check out Kalyn's article, "Tackling Tofu." Then try her Stir Fried Tofu with Scallions, Garlic, Ginger and Soy Sauce, which she submitted to my Beautiful Bones event that runs through May 31st. Ever humble, Kalyn gives Mark Bittman too much credit -- she clearly has the tofu touch.

Here's some help with understanding tofu:

  1. Firm tofu (and extra-firm) is dense and holds less water than other types, so it's ideal for sauteing and grilling because it maintains its shape. Usually you have to place the tofu between two sheets of paper towels and place a heavy object like a pan on top to squeeze the water out. Most extra firm tofu, however, has so little water that just patting it dry is sufficient. Try it in salads, sandwiches, and stir-fries.
  2. Soft tofu is great for blending. Use it in soups, dressing, or sauces.
  3. Silken tofu has a soft, creamy texture and also works well in blended dishes such as purees and desserts such as puddings.
trader joe's tofu

My favorite brand, Trader Joe’s Super Firm Extra High Protein Organic Tofu, has a whopping 14 grams of soy protein and only 100 calories per serving. I really love it with string beans and Thai peanut butter sauce, which is faster to make than ordering take-out. That's why I'm sending it to a new blogger friend, the delightful Rita of Mochachocolata-Rita for her Chinese Take-Out Party. The longest part is the rice, but you could make it ahead of time, use a quick cooking rice, or even make it the microwave. The rest of the meal takes about 15 minutes.

string beans and tofu in Thai peanut butter sauce

String Beans and Tofu with Thai Peanut Butter Sauce

Makes 4 servings
Print recipe only here.

3/4 pound string beans, cleaned and trimmed
12 ounces extra-firm tofu, sliced into strips
1 teaspoon sesame oil

Sauce:
2 cups lite coconut milk
3 tablespoons low-sodium soy sauce
3 tablespoons chunky peanut butter
1 tablespoon plus 1 teaspoon light brown sugar
juice of 1/2 lime (about 2 teaspoons)
2 tablespoons minced fresh ginger
1 tablespoon hot curry powder
1 Thai chili, minced (with or without seeds--you decide)
1 tablespoon cornstarch dissolved in 1 tablespoon water
salt, to taste

1 tablespoon chopped unsalted, roasted peanuts
1 tablespoon toasted unsweetened shredded coconut, optional
1 tablespoon chopped fresh cilantro, optional

2 cups cooked brown rice

Bring a large pot of water to a boil. Cook string beans for two minutes. Drain and plunge into a bowl of ice water to stop the cooking and retain their vibrant green color. After 1-2 minutes, drain and pat dry. Set aside.

To cook tofu, add 1 teaspoon sesame oil to a large non-stick skillet. Add tofu and saute over medium-high for 7-10 minutes, or until lightly golden and crispy.

To make the sauce, combine all ingredients in a bowl, and whisk until nearly smooth (the pb is chunky, after all).

In a medium pot, add the peanut butter sauce and cook over medium heat for 3-5 minutes, until bubbly. Lower the heat, and continue cooking until sauce begins to thicken. Add the cooked string beans to the skillet with the tofu, then pour the sauce on top. Mix well and cook over a low heat for 2-3 minutes, or until the sauce clings to the tofu and vegetables.

Serve over brown rice, and top with chopped peanuts. Garnish with toasted shredded coconut and fresh cilantro, if desired.

Check out these tantalizing tofu dishes:
Here are two calcium-rich recipes you might like:

Breakfast Egg Sandwich with Avocado and Chipotle-Mayo


Sicilian Sardine and Broccoli Rabe Pasta


Save This Page on Del.icio.us


Note: Many women are concerned about eating tofu or other soy products for fear that the isoflavones, which can mimic the action of natural estrogens, might lead to cancer. This is complicated. There is no conclusive evidence that shows soy causes cancer. In fact some studies have suggested that soy may reduce a women's risk for some cancers, such as ovarian, while others have suggested a diet very high in soy may increase a woman's risk for some cancers, such as breast cancer. If you have concerns about soy, especially if you have/have had breast cancer or are on hormone replacement therapy, then you should discuss it with your doctor.

photo credit: gaia online

Friday, May 9, 2008

I Heart Mom's Stuffed Artichokes


You asked for it, and here it is: The recipe for my mom's stuffed artichokes.

I could tell you all about artichokes: how they date to antiquity, how they're actually edible flower buds, and how the heart (the most delectable part) is the caviar of vegetables. But you can read what I wrote here for that.

Today I want to focus on my mom's stuffed artichokes. I've been making stuffed artichokes with my mom since I was about 6 years old. When my hands were still too small to tackle the prickly, cactus-like leaves of the artichoke, I was in charge of making the stuffing. There was something indescribably satisfying about it: first I wet the stale Italian bread and squished in between my fingers, then I grated lots of cheese and added a slew of black olives (which, by the way, made lovely finger extensions). It gave "playing with your food" a whole new perspective.

When I got a bit older, I learned how to properly clean an artichoke (which is no easy task). Maybe that's why I appreciate them so much today.

Ironically, my mom never ate her stuffed artichokes. She always made them for my dad and me. After I moved away from Rhode Island, I didn't make artichokes for a long time. They'll never be as good as Mom's, I'd say. Then one spring day I asked my dad if Mom had made any stuffed artichokes lately. He lamented, "she doesn't like making them now that you're not home to have them." So strangely none of us was making or eating artichokes anymore.

This changed one Sunday after we moved to California, where virtually 100% of US artichokes are grown, including colossal Big Hearts. Upon seeing them for the first time, I audibly gasped. They were enormous-- about 6 inches across with 6-8-inch- long stems. I bought two. My mom talked me through the process of making them (there was never a recipe). They were good (not as good as Mom's), but good.

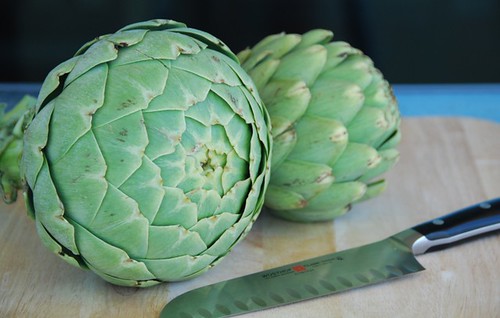
big heart and globe artichokes
Big Heart artichoke at left and Globe artichoke at right

I've gotten much better at cooking artichokes over the last 5 years, and when my parents visited a couple of months ago, I surprised my dad with the BIGGEST Big Heart artichoke I have ever seen. It weighed nearly 3 pounds! The only problem was it took 2 hours to cook. Remember, the bigger the artichoke, the longer the cooking time. And please don't believe people who say big artichokes have no flavor. They do.

So next time you're at the market, pick up a couple of artichokes, and follow my Artichokes 101 guide for cleaning and cooking them. Then make my mom's stuffed artichokes. You won't be disappointed.

I'm sending my stuffed artichoke to Laurie of Mediterranean Cooking in Alaska and Kalyn of Kalyn's Kitchen's for this week's round of WHB hosted by Laurie. I mean, really, it's just too big for one person to eat.

Speaking of Mom and Rhode Island, have you met Mary of Sweet Mary? I discovered her blog when I peered into her kitchen pantry a few weeks ago at Lydia's; we have become regular visitors since. Mary lives in Rhode Island and graciously interviewed me for her blog. Why not say "hi" to Mary and check out her sweet recipes like Dad's Favorite Italian Cake, or her hilariously named I Hate Winter Where the Hell is Spring Pie. With a name like that, it's gotta be "wickit awesome!"'

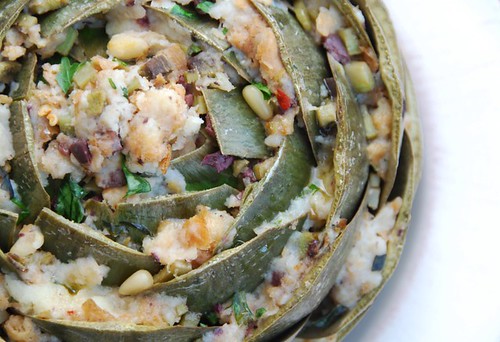
A colossal stuffed Big Heart artichoke

Italian Stuffed Globe Artichokes

Makes 2
Print recipe only here.

You could stuff just the cavity of the artichoke, but where's the fun it that? Stuffing the leaves makes a more impressive presentation and makes it more fun to share (if you want to).


2 globe artichokes, about 1 pound each
2 trimmed, peeled, and diced artichoke stems
1 lemon, cut in half (for rubbing the artichoke)
Stuffing:
1 teaspoon extra virgin olive oil
1/2 loaf stale Italian bread, torn into small pieces
1 tablespoon extra virgin olive oil
1/4 cup Kalamata olives, finely chopped
1/4 teaspoon crushed red pepper flakes
1 tablespoon fresh minced parsley
1 tablespoon fresh minced basil
1/4 cup grated Reggiano-Parmigiano cheese
1 tablespoon toasted pine nuts
salt, to taste
For the cooking pot:
1 lemon, sliced (for cooking)
1 tablespoon extra virgin olive oil, plus 2 teaspoons

To make the stuffing, cut stale bread into a few thick slices and moisten with warm water. Wet the bread just enough to soften it but not soak it. If it's too wet, then just squeeze it dry with your hands. Tear the bread into small pieces (about 1/2-inch), and place in a large bowl.

Meanwhile place an artichoke on a cutting board and cut off the stem. Using a sharp knife, remove the fibrous outer part of the stem and discard. Cut the remaining center of the stem into long, thin strips, then dice. Place in a small skillet with 1 teaspoon olive oil over medium heat, for 2-3 minutes, or until lightly browned. Add to the bowl of bread. Add 1 tablespoon extra virgin olive oil, chopped olives, crushed red pepper flakes, parsley, basil, and cheese and mix well.

To toast the pine nuts, place in a small dry skillet over medium heat for about 1 minute, or until golden brown. Shake the pan handle gently to ensure even toasting. Add to the bowl of bread and season generously with salt. Mix the stuffing well with your hands, breaking up any large pieces of bread. If it seems too dry or crumbly, add a little more olive oil or water; if it's too moist, add a bit more bread. I usually taste it at this point and adjust the seasonings as necessary. (If making the stuffing ahead, then place in an air-tight container and store in the refrigerator up to 3 days).

To clean the artichokes, cut off the stem from 1 artichoke (which you’ve already done for the stuffing) and set aside. Cut off the top ½ inch the artichoke and discard. Using a pair of kitchen shears, trim off the tips of the remaining leaves. Rub the leaves all over with a lemon half.

Using your thumbs, gently separate the leaves (the fresher the artichoke, the tighter the leaves). Pull out the purple tipped leaves from the center and several surrounding yellow leaves until you reach the fuzzy choke. Using a small spoon, scoop out the choke until no fuzzy remnants remain. Then squeeze some lemon juice inside the cavity to keep it from oxidizing, or turning brown. Repeat with second artichoke.

To stuff the artichokes, begin by placing 2-3 tablespoonfuls of stuffing into the cavity of each artichoke to prevent the leaves from closing up over it. Then using your hands, fill each leaf with about 1/2-1 teaspoon full of stuffing, starting at the outermost leaves and working your way toward the center. Try not to over stuff the leaves early on, in case you run out of stuffing by the time you get to the second artichoke! You can always go back and add more stuffing if you’d like.

To cook the artichokes, use a large deep sauce pan and fill it with 3 inches of water. Add a whole sliced lemon and 1 tablespoon olive oil to the water. Place stuffed artichokes in the pan close together so they don’t tip over. Drizzle each with one teaspoon of extra virgin olive oil. Cover tightly with a lid and bring to a boil for 10 minutes. Then lower the heat to a simmer, keeping the pan only partially covered, and cook for 45-60 minutes, or until leaves are tender.
To check for doneness, try pulling a leaf from the artichoke, it should come out easily; too much tugging means it needs to cook more. You can also get a long, think knife and insert it into the center of the artichoke; it should easily go through to the heart. Lift the knife straight out so you don’t cut the heart.

Transfer cooked artichokes to a large plate or shallow bowl and let cool for 5 minutes before eating. They can also be kept warm by loosely covering with foil and eating within 15- 20 minutes.

You might also like these other Mom-inspired dishes:
Pizza Chena (also called Pizza Gaina) a colossal Italian meat and cheese pie


Savory Sausage and Fennel Galette


Hello Dolly Cookie Bars


Italian Pignoli (Pine Nut) Cookies


Save This Page on Del.icio.us

Wednesday, May 7, 2008

Sicilian Sardine and Broccoli Rabe Pasta for Your Man

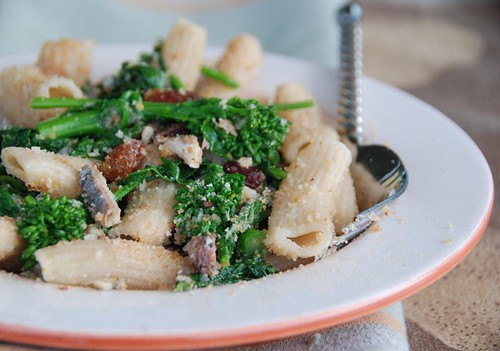
Sicilian Sardine and Broccoli Rabe Pasta

Osteoporosis is a condition overwhelmingly associated with women. That's because of the estimated 10 million Americans with osteoporosis, 8 million are female. That also means, however, that 2 million are men. And, unfortunately, another 12 million men are at risk for developing it.

According to the National Osteoporosis Foundation (NOF), the most common risk factors for osteoporosis in men include:
  • prolonged exposure to certain medications, such as steroids to treat asthma or arthritis
  • chronic disease that affects the kidneys, lungs, and intestines, altering hormone levels
  • undiagnosed low levels of testosterone
  • smoking
  • excessive alcohol consumption
  • low calcium intake
  • lack of physical activity
  • bone loss associated with older age
  • heredity
  • race--though men from all ethnic groups may develop osteoporosis, white men appear to have the greatest risk for it
Since osteoporosis afflicts mostly women, it remains under diagnosed in men. If you (or a special guy in your life) has some of the above risk factors, then discuss them with your doctor. Other concerning signs of osteoporosis in men include:
  • loss in height
  • change in posture
  • pain in the lower back
  • sudden bone fractures or breaks
Like women, men who are diagnosed with osteoporosis should:
  • Get enough calcium every day. The NOF recommends 1,000 mg of calcium daily for men under age 50 and 1,200 mg for men over 50.
  • Get an adequate amount of vitamin D which helps the body absorb calcium. Men under the ago of 50 need 400-800 IU of vitamin D each day, while men over 50 need 800-100o IU.
  • Engage in regular physical activity that includes a combination of weight bearing exercise and resistance training.
And, of course, eat foods that are high in calcium and vitamin D. I make sardine dishes for Jeff because he loves them, and because I love him and want him to have healthy bones. One (3.75 ounce) can of sardines is about 150 calories and 20 grams of protein; it provides 10% of the daily recommended allowance of iron and a whopping 20% of calcium. You can buy imported Italian sardines in olive oil (which are more expensive but much better according to Jeff) or sardines in spring water.

Then whip up this pasta dish in under 15 minutes. The bold flavors of sardines and broccoli rabe are tempered with sweet raisins and zesty lemon.

And don't forgot to check out Nuria's Marinated Sardines over at Spanish Recipes. I never knew sardines could look so pretty.

Sicilian Sardine and Broccoli Rabe Pasta

Sicilian Sardine and Broccoli Rabe Pasta
Serves 4
Print recipe only here.

1 medium bunch broccoli rabe (rapini)
2 tablespoons olive oil
3 tablespoons raisins (soaked in a little white wine)
1/2 cup breadcrumbs
1/4 cup pine nuts
1 small garlic clove, finely chopped
2 shallots, finely chopped
2 cans sardines in olive oil, drained
2 teaspoons lemon juice, preferably Meyer lemon
1/4 teaspoon lemon zest
1/4 teaspoon crushed red pepper flakes
salt, to taste
2 tablespoons fresh parsley, finely chopped
8 ounces rigatoni

Bring a large saucepan of salted water to a boil. Boil broccoli rabe for 1 ½-2 minutes; drain and plunge into a bowl of ice water. Shocking the rabe will maintain its vivid green color and stop it from cooking.

Place the raisins in a small bowl and cover with some dry white wine. Let them soak about 10 minutes to become infused with the flavor of the wine.

Crush the pine nuts. In a small, dry skillet over medium heat add the pine nuts and breadcrumbs. Shake pan in a back-and-forth motion until they are are golden and aromatic, about 1-2 minutes. Remove from heat and set aside.

In a large skillet over medium heat, warm the olive oil. Add garlic and shallots, sauteing 2-3 minutes, or until lightly browned. Drain the broccoli rabe, pat dry, and add to the skillet.
Meanwhile, drain the sardines and remove the backbones. Using a fork, break sardines
into small pieces and add to the skillet. Add the drained raisins, lemon juice, lemon zest, crushed red pepper, and salt. Sauté 1-2 minutes more. Remove from heat.

Cook pasta in salted water according to directions, being sure to keep it al dente. Add cooked pasta to the skillet with the broccoli rabe mixture, and toss in the toasted bread crumb mixture and fresh parsley.

Plate the pasta, finishing it off with a drizzle of quality extra virgin olive oil.


You might also like these guy-friendly, high-calcium meals:

Breakfast Egg Sandwich with Avocado and Chipotle-Mayo


New England Clam Chowder


Spinach, Nutmeg, and Ricotta Pie


Shrimp Tacos with Citrus-Avocado Salsa


Save This Page on Del.icio.us

Sunday, May 4, 2008

Muffin Tops: Flat or Pointy?

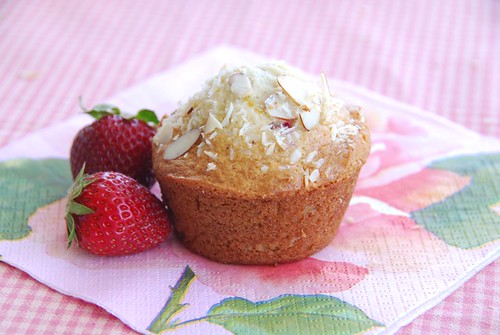
strawberry muffin napkin 2
What makes a muffin top pointy?

Until this year, every batch of muffins I ever made was a flat-topped failure. I consulted cookbooks, called my mom (whose muffins are always perfect) and tried every conceivable combination of baking powder, baking soda, oil, butter, and eggs. I used dark muffins tins, light muffin tins, different oven temperatures, electric mixing, hand mixing -- still flat. My final attempt wasn't pretty -- twenty-four unevenly cooked, pancake-flat muffins (from 2 different attempts) along with my muffins tins, ended up in the trash, as I declared, "That's it! I'm never making muffins again!"

All this changed when I made my honeyed orange ginger muffins this year. After about 7 minutes, I turned on the oven light and peeked inside. I was shocked. They were rising. I started jumping up and down and exclaiming, "Jeff, my muffins are rising! They're actually rising!"

"Don't jump up and down!" he said. "Don't do anything to jinx it this time." He had a point.

We actually stood at the oven watching those muffins rise as gloriously as angels. After years of abject muffin failure, it was a beautiful moment.

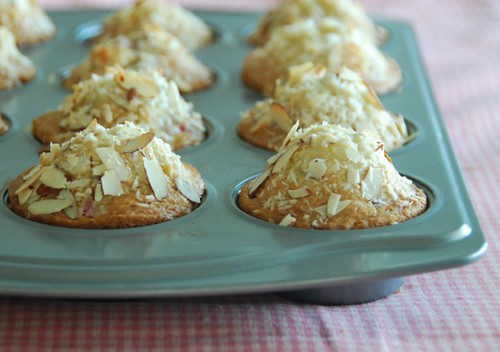
strawberry coconut muffins in pan

Each plump muffin had a small hill top. I couldn't have been more pleased. Since then I have made several batches, all successful. So what's my secret? Darned if I know. But here are a few suggestions:
  • Use both baking powder and baking soda which are leavening agents.
  • Stir with a spatula, not an electric hand mixer, for a lighter batter.
  • Use light colored bake ware rather than dark to keep the muffin bottoms from burning.
  • Fill the muffin cups 3/4's of the way to the top.
  • Place the muffins in the center of the oven at 350-375 degrees F. Many muffin recipes call for a hotter oven (400-425 F), but I have found they usually burn on the outside and remain undercooked on the inside.
  • Talk sweetly to the muffins as they're baking. Don't underestimate the power of kindness.
  • If all else fails, buy a GE Monogram oven. I have made muffins in 7 different ovens, and persistence pays off.
Made with creamy coconut milk, these muffins are moist and cakey with tiny pieces of fresh, juicy strawberries baked inside. Each delicious bite is laced with tangy honey and aromatic toasted coconut and almonds. In fact, your entire kitchen will be redolent with the fragrance of rich almond and sweet strawberries. That's why I'm contacting Yankee Candle to suggest it as a new fragrance-- Food Blogga: Strawberry Almond Delight Candle. Whadda ya think?

I'm sending my muffins to Michele of Greedy Gourmet who is hosting the third round of Snack Shots. This time she wants muffins, any and all muffins. But hurry! Tuesday is the deadline.

Fresh Strawberry, Almond, and Coconut Muffins
Makes 12 regular size muffins
Print recipe only here.

Muffins:
2 cups all-purpose flour
3/4 cup granulated sugar
1 1/2 teaspoons baking powder
1/2 teaspoon baking soda
1 teaspoon salt
2/3 cup lite coconut milk
2 tablespoons butter, melted
1 egg, lightly beaten
1 teaspoon orange zest
3 tablespoons orange blossom honey
2 teaspoons pure almond extract**
1/4 cup toasted sweetened shredded coconut
2/3 cup diced fresh strawberries**

Topping:
2 tablespoons sweetened shredded coconut
2 tablespoons sliced almonds

Place rack in center of oven and preheat to 375 degrees F. Spray a 12 mold regular size muffin pan with cooking spray.

Wash strawberries, remove the hull, and pat dry. Dice and set aside.

In a large bowl, combine flour, sugar, baking powder, baking soda, and salt.

In a separate bowl, whisk together coconut milk, melted butter, and egg. Add the orange zest, honey, and almond extract, and whisk until just combined. Add to the flour mixture, and stir quickly until well combined. Fold in the strawberries and toasted coconut. Spoon the batter evenly into the 12 molds.

For the topping, mix 2 tablespoons sweetened shredded coconut and 2 tablespoons sliced almonds in a small bowl. Sprinkle on top of muffins.

Bake for 18-20 minutes, or until the tops are golden and a cake tester inserted into the center of a muffin comes out clean. Transfer the pan to a rack to cool for 5 minutes before removing each muffin and placing on a wire rack to cool.

**Note: Pure almond extract is deliciously, intensely flavorful. If you want a mild almond flavor, then I'd suggest 1-1 1/2 teaspoons; if, like me, you want a bold almond flavor, then I'd add 2 or even 3 teaspoons. You decide.

Strawberries are often considered "too watery" to use in baked goods such as muffins and breakfast breads. Here are some tips for baking successfully with fresh strawberries:
  • Use only really fresh berries that are firm, not mushy.
  • Don't add too many strawberries to the batter which could make it too wet.
  • Avoid using frozen strawberries, which would be too watery.
You might also like:

Honeyed Orange Ginger Muffins (Quat, Optional)


Ricotta Hotcakes with Peaches


Banana Coconut Almond Bread


Strawberry-Rhubarb Sponge Pudding


Save This Page on Del.icio.us

Thursday, May 1, 2008

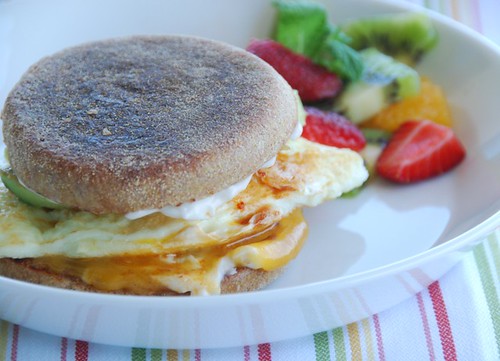
Breakfast Egg Sandwich with Avocado and Chipotle Mayo

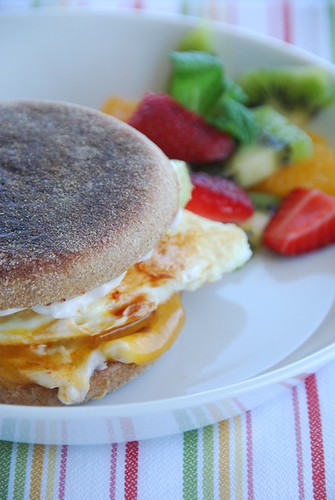
breakfast sandwich with eggs, cheddar, and chipotle chili

Listen to your mom. A healthy breakfast is the most important meal of the day. Plus it's an easy way to get a healthy dose of calcium for your bones.

Not a breakfast eater? Could you try eating breakfast for 3 weeks? Because that's how long it takes your brain to develop a habit, and this is one healthy habit.

Eating a healthy breakfast can help you:
  • Jump start your metabolism, so you burn more calories all day long.
  • Consume fewer calories throughout the day since you tend to be less hungry and make smarter eating choices.
  • Stabilize your blood sugar, which has been linked to a decreased risk of cardiovascular disease and Type 2 diabetes.
  • Concentrate and perform better at work (hey, maybe that whole wheat toast and scrambled eggs could help get you a raise).
  • Build endurance with physical activity, so your work-outs will be better.
What should you eat for a healthy breakfast?
  1. Complex carbohydrates or "good carbs" such as whole grains, fruits, and vegetables. (Pop-Tarts are not a whole grain).
  2. High fiber foods. Fresh fruit and whole grain cereals help you stay fuller longer, so you won't be starved an hour after eating breakfast.
  3. Lean protein such as non-fat dairy, legumes, and egg whites. It keeps you satiated and builds lean muscle which helps burn fat and calories.
  4. A little bit of "good fat" is optional. "Good fats" or monosaturated fats include olive, peanut, and canola oils as well as fresh avocados, most seafood, and most nuts.
No time for breakfast? Here's some help to create healthy, calcium-rich breakfasts. Just click here to learn more about my Beautiful Bones Osteoporosis event.

When you're in a rush:
  • Power bars. Cliff Builder Bars are made with soy protein and taste great. They average 270 calories, 20 grams of protein, and have an impressive 25% of your daily calcium needs.
  • Whole wheat crackers with peanut butter and a glass of skim milk.
  • A smoothie made with calcium-fortified orange juice, soy milk, or skim milk.
  • A glass of skim milk, a banana, and a dozen dry roasted, unsalted almonds.
When you've got 15-30 minutes to eat:
  • A bowl of high fiber oatmeal, or whole grain cereal such as Kashi, with skim milk, fresh berries, and a few almonds or walnuts.
  • A bowl of low-fat or non-fat yogurt or cottage cheese with granola and fresh fruit.
  • A whole wheat wrap filled with scrambled egg whites, black beans and salsa.
  • A breakfast egg sandwich made with multi grain English muffins.
  • Whole wheat toast with almond butter, banana, and honey and a glass of skim milk.
  • A hard boiled egg, an orange, and a glass of skim milk.
When you're kickin back:This egg sandwich can be made in less than 15 minutes and will keep those stomach growls at bay for hours. With a multi-grain English muffin instead of plain, egg whites, avocado, soy mayo, and a little cheese, this is one high calcium, high protein, satisfying breakfast.

breakfast sandwich with eggs, cheddar, and chipotles chilis

Breakfast Egg Sandwich with Avocado and Chipotle Mayo
Serves 1
Print recipe only here.

1 multi-grain or whole wheat English muffin
3 egg whites
a dab of olive or canola oil
about 1 teaspoon soy mayo mixed with 1 teaspoon chipotles in adobo sauce
1/4 of an avocado, sprinkled with lime juice
1 ounce cheddar cheese

Toast the English muffin. Mix the soy mayo and chipotle chili and set aside. Slice the avocado and sprinkle with lime juice to prevent it from oxidizing, or turning brown; set aside.

Rub a dab of olive or canola oil over the surface of a small non-stick skillet over medium heat Add egg whites and cook 2 minutes, or until slightly puffed; fold in half and cook 1 minute, or until lightly browned; flip, add the cheddar cheese, and cook 1 minute more (or until your preferred doneness).

Spread the chipotle mayo on the toasted English muffins. Add the eggs with melted cheese and avocado slices.

Serve with a side of fresh fruit such as calcium-rich oranges and berries seasoned with mint.

Save This Page on Del.icio.us