Monday, June 29, 2009
Mom's Blueberry Sweet Rolls Taste Like Summertime
It's blueberry season. Glorious, juicy, sweet blueberry season.
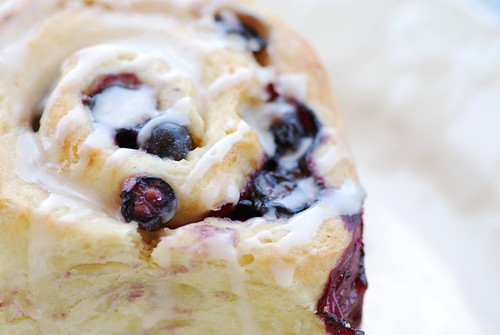
If you're looking for one fabulous blueberry treat this summer, then you've got to make my Mom's Blueberry Sweet Rolls. She has been making them since I was a little girl, and my love for them has never waned.
Each bun has warm, juicy, cinnamon-sugar coated blueberries tucked inside of a pillowy soft sweet dough that is glazed with vanilla icing. There is something ambrosial about these buns: they're delicate and pretty enough for a ladies' summer tea party yet homey and comfy enough for a midday snack with a glass of milk.
So next time you go blueberry picking, save a pint of your best berries for Mom's Blueberry Sweet Rolls. Trust me, summer never tasted so good.
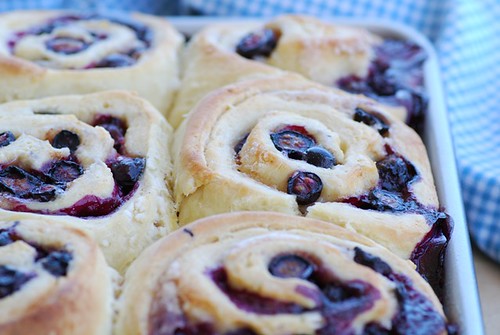
(You could eat these buns unglazed, but you wouldn't want to do that.)
Retraction: Please note that the original posting said that the dough could either be mixed by hand or processed. The dough should be hand mixed only.
Mom's Blueberry Sweet Rolls
Makes 9 rolls
Print recipe only here.
Mom's Blueberry Sweet Rolls are easy to make, but plan ahead since the dough has to be refrigerated overnight.
Dough:
2 packets of yeast
1/2 cup warm water
3/4 cup warm milk
1 cup melted butter
2 large eggs
1 cup granulated sugar
1 teaspoon salt
1 teaspoon pure vanilla extract
4 1/2 cups all-purpose, or as much as it takes
1 tablespoon melted butter for brushing over dough
Blueberry Filling:
1 pint fresh blueberries
1/2 cup granulated sugar
1 tablespoon all-purpose flour
2 teaspoons ground cinnamon
Vanilla Icing:
1 cup confectioners' sugar
2 teaspoons pure vanilla extract
a few droplets of milk
Sprinkle with chopped toasted pecans, optional
1. Mix all of the dough ingredients in a large bowl, and knead lightly by hand until the dough comes together. Roll into a ball, wrap in plastic wrap, and refrigerate overnight.
2. In the morning, the dough will be hard. Let it rest on the counter until it's just cool or at room temperature. Roll it out into a large rectangle. Brush with 1 tablespoon melted butter.
3. Place rack in center of oven and preheat to 350 degrees F. Butter or coat with cooking spray an 8-inch square pan.
4. In a medium bowl, mix the blueberries, granulated sugar, flour, and cinnamon, until well coated, and spread evenly over the dough. Lightly press the berries with your hand so they stick into the dough. Starting with the long side closest to you, begin rolling the dough as tightly as you can, tucking in any stray blueberries as you go. Place the end seam side down, and tuck the ends of the roll under so the berries don't escape. Place the roll in refrigerator for 5 minutes to make slicing easier. Using a sharp knife, cut the roll into 9 equal size pieces.
5. Place the rolls in a prepared 8-inch square dish. Cover with a clean dish towel, and allow to rest on the counter top for 45-60 minutes, until risen and puffy. Bake for 40-45 minutes, or until the tops are golden and a toothpick inserted into the center of the dough comes out clean. Place pan on a rack, and cool.
6. To make the icing, whisk confectioner's sugar, vanilla, and milk until smooth, but not too thin-- it should cling nicely to the back of a spoon. Once the buns are cooled, pull them apart (it helps to run a blunt knife between the buns first). Place buns on a wire rack with a sheet of parchment paper underneath it. Drizzle with icing, and rest for about 1 hour, or until the icing has hardened. Serve at room temperature.
You might also like these summertime fruity desserts:
Peach and Blueberry Galette
Fresh Blackberry, Oatmeal, and Cashew Cake
Fresh Cherry and Peach Upside-Down Cake
Strawberry Cardamom Cake
Here are more delicious blueberry recipes you might enjoy:
Blueberry Cobbler from Melecotte
Blueberry Crumb Cake from Family, Friends, and Food
Blueberry and Strawberry Buttermilk Cake at Pinch My Salt
Blueberry Muffins at Obsessed With Baking
P.S. Congratulations to The Mama, aka Heather for winning the grilling kit from Fire and Flavor!
Wednesday, June 24, 2009
A Product Review and Give-Away for Cedar Grilling Planks
It's almost the 4th of July, and Americans are gearing up for cookouts. According to the National Retail Federation, 62.6% of Americans will host or attend a cookout, barbecue or picnic this year.
Everyone knows that any decent 4th of July cookout will have hamburgers, hot dogs, corn on the cob, potato salad, and watermelon. But if you want to add some panache to your cookout, then consider buying a cedar grilling plank.
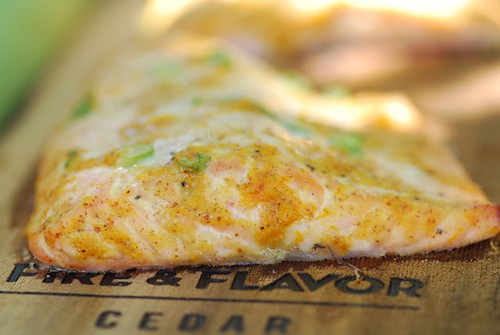
Recently I was asked to do a product review for Fire and Flavor's cedar grilling plank. I was quite pleased with it. According to the company, the plank is made from all natural western red cedar and contains no additional flavorings. It was easy to use: I soaked the plank in water for the recommended 1 hour. (Don't skimp on the time, or the wood could burn too much when grilling.) I placed the salmon on the plank and set it directly on the heated grill racks. It cooked in about 15 minutes.
I really loved the fragrance of the wood while it was cooking. It had a sweet, woodsy aroma that definitely whetted the appetite, as was evidenced by the people near the grill asking, "Mmm... what's that wonderful smell?"
The salmon cooked evenly and maintained its shape perfectly. As for the taste, well, it was lovely. I can't say that it had a particularly woodsy flavor; it was more subtle. When I made beef on the plank, however, I detected a more discernible smoky flavor that was delicious. The meat was succulent and not overly charred as it tends to get when grilling.
The plank can be washed in warm, soapy water, air-dried, and reused 1-2 more times, if not overly charred. The plank comes with clear, easy instructions and several great recipes.
Overall, I would definitely recommend this product.
Now for the best part! Fire and Flavor is offering a lucky Food Blogga reader a chance to win a Fire & Flavor "kit," with goodies such as a cookbook, cedar grilling planks, and cedar papers. Click here for details, and leave your comment below by the end of the day, Sunday, June 28, 2009!
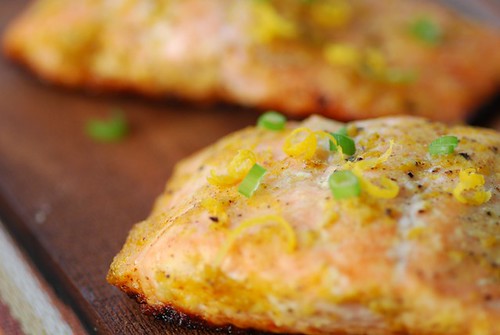
Orange and Ginger Glazed Planked Salmon
Makes 2 servings
Print recipe only here.
2 (4-6 oz) salmon filets
1 tablespoon Dijon mustard
1 tablespoon honey
1 teaspoon unseasoned rice vinegar
1 teaspoon minced fresh ginger
1 teaspoon orange zest, plus extra for garnish
salt and several cranks freshly ground black pepper
1 scallion, thinly sliced, for garnish
1. In a small bowl whisk all ingredients from Dijon through black pepper. Using a pastry brush, coat salmon filets with the sauce.
2. Preheat grill to medium low (350-400 degrees F), and set soaked plank on grill rack. Close lid, and heat for 3 minutes. Flip flank over, and place salmon on top.
3. Close lid. Cook for 12-15 minutes, or until salmon turns pink and the flesh is opaque in the middle.
4. Remove plank from grill. Sprinkle salmon with sliced scallions and serve immediately.
You might also these grilled dishes:
Grilled Watermelon Slices with a Honey-Lime Syrup
Sunday, June 21, 2009
What's Your Favorite Chicken Sandwich?
How did chicken sandwiches become so popular in the U.S.? Supply and demand. The emergence of large scale chicken processing companies such as Perdue and Tyson in the 1920’s and 1930’s respectively, helped propel chicken’s popularity in America. With such easy availability, chicken prices decreased, consumption increased, and chicken became a steady part of the American diet.
With many families cooking whole chickens, leftovers became standard lunch fare. Sliced leftover chicken meat became a favorite filling for sandwiches (and was the original filling for the classic club sandwich).
Fast food chicken sandwiches as we know them originated in 1967, when Truett Cathy, founder of the Atlanta based restaurant chain Chick-fil-A, introduced the chicken sandwich -- a perfectly crispy-on-the-outside, juicy-on-the-inside breaded boneless breast of chicken served on a toasted buttered bun with dill pickle chips. Whether it's fact or fiction, Cathy claimed that pickles were the only condiment he had on hand, and to his delight, were a big hit with consumers. Other fast food chains quickly followed suit. Then in the late 1980's and early '90's the grilled chicken sandwich emerged as a healthier alternative to the fried original.
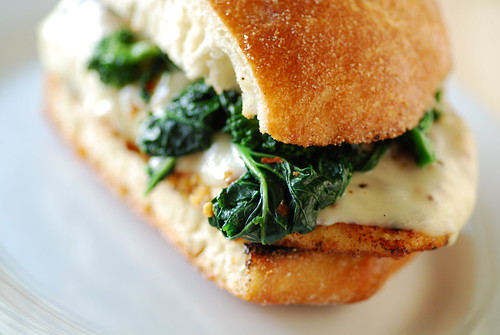
It seems everyone has a favorite chicken sandwich; mine is an Italian chicken cutlet sandwich with garlicky sautéed broccoli rabe (a popular Italian vegetable know for its distinctively bold and bitter flavor) and melted sharp Provolone cheese. The best place to get this type of chicken sandwich is at a mom 'n pop Italian deli or pizzeria, where all the guys behind the counter are named Paulie, Joey, or Tony. If you don't have one where you live, then just make your own, because this sandwich is freakin' awesome.
So, tell me, what's your favorite chicken sandwich?
Italian Chicken Cutlet Sandwich with Broccoli Rabe and Provolone
Makes 4 sandwiches
Print recipe only here.
Chicken:
4 (4-6 ounces) chicken cutlets (about ½-inch thickness)
2 large eggs
2 tablespoons milk
1/8 teaspoon crushed red pepper flakes
1/8 teaspoon salt
¼ cup all-purpose flour
2/3 cup plain breadcrumbs
3 tablespoons olive oil
Broccoli Rabe:
1 bunch broccoli rabe, stems removed*
1 tablespoon olive oil
2 garlic cloves, thinly sliced
¼ teaspoon crushed red pepper flakes
½ teaspoon salt
4 torpedo rolls or ciabatta rolls
8 slices provolone cheese
1. In a wide, shallow bowl, whisk eggs, milk, crushed red pepper, and salt.
2. Place flour in a separate wide, shallow bowl. Repeat with breadcrumbs.
3. In a large skillet over medium heat, add 3 tablespoons olive oil.
4. Dip one chicken cutlet at a time in the flour, then in the egg mixture, allowing excess to drip into the bowl. Dredge in the bread crumbs, ensuring that the entire cutlet is evenly coated. Add to the skillet, and cook 3-4 minutes on each side until golden brown and crisp. Place on a paper-towel lined dish. Repeat with remaining slices.
5. Bring a large saucepan of salted water to a boil. Boil broccoli rabe for 2 minutes; drain and plunge into a bowl of ice water. “Shocking” the rabe will maintain its vivid green color.
6. In a large skillet over medium heat, add 1 tablespoon olive oil and garlic. Sauté until garlic starts to turn golden. Add broccoli rabe, crushed red pepper, and salt. Sauté 1-2 minutes more until just tender.
7. Place one split roll on a clean work surface. Place chicken cutlet on the bottom half of the roll. Top with ¼ of the broccoli rabe and 2 slices of cheese. Place under a broiler for 1-2 minutes, or until the cheese melts. Serve immediately.
*Shopping Note: Broccoli rabe, also known as rapini, rape, and broccoli raab, is a popular Italian vegetable. It looks like slender broccoli and has a sharp, slightly bitter flavor. It is available at Italian markets as well as most major supermarkets.
Variation:
Substitute veal cutlets for chicken.
You might also like:
Broccoli Rabe (Rapini) and Sausage Sandwich with Sharp Provolone
Grilled Lamb Sandwich
Monte Cristo Sandwich
Wednesday, June 17, 2009
A Must Make Strawberry and Cardamon Crumb Cake Recipe
It's peak strawberry season which means strawberry shortcake, milkshakes, ice cream, parfaits, pies, and muffins. It also means it's time for strawberry cardamom crumb cake.
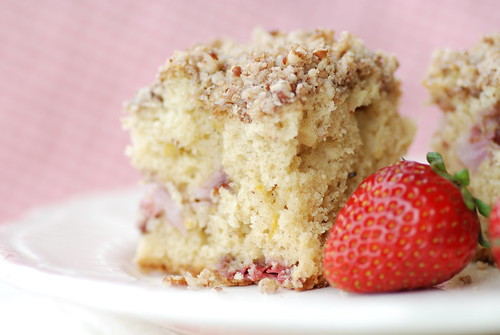
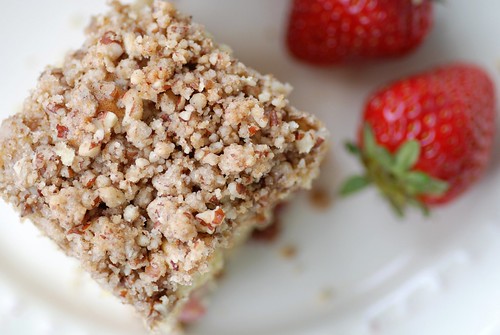
This cake has a deliciously old-fashioned feel to it -- like the cake your grandma would make for dessert after Sunday supper. The crumbly, sweet topping gives way to a fluffy, moist cake laced with spicy cardamom and punctuated with juicy strawberry pieces. It's the ideal cake for visiting, Sunday brunch, or afternoon tea. So don't let strawberry season pass you by without baking this strawberry and cardamom crumb cake. After all, you don't want to disappoint Grandma.
Strawberry and Cardamom Crumb Cake
Print recipe only here.
Topping:
1/2 cup all-purpose flour
1/3 cup brown sugar
1/8 teaspoon salt
1/8 teaspoon ground cardamom
1/2 cup chopped pecans
4 tablespoons butter, melted
Cake:
2 cups all-purpose flour
2 teaspoons baking soda
1/4 teaspoon salt
1 teaspoon ground cardamom
6 tablespoons unsalted butter
2/3 cup granulated sugar
2 large eggs
2 teaspoons grated lemon zest
1 teaspoons pure vanilla extract
3/4 cup buttermilk (OR vanilla soy milk)
1 cup fresh strawberries, hulled, rinsed, patted dry, and sliced
Place rack in center of oven and preheat to 350 degrees F. Butter or coat with cooking spray an 8 inch square pan.
To make the crumb topping, in a small bowl combine flour, sugar, salt, cardamom and pecans, and toss until well combined. Pour melted butter evenly over mixture, and using your fingers quickly toss and pinch the mixture until little pebbly pieces form. Refrigerate while making the cake.
In a large bowl, combine flours, baking soda, salt, and cardamom.
In another large bowl, using an electric hand mixer cream the butter and sugar. Add eggs, lemon zest, and vanilla, and beat at medium speed until light. Reduce speed to low, and add the buttermilk. Beat until well blended. Add the dry ingredients; beat until just incorporated and the flour is dissolved. The batter will be thick and creamy. Using a rubber spatula, fold in the sliced strawberries.
Pour the batter into the pan and gently shake it to even it out. Sprinkle the crumb topping evenly over the top of the cake, and press lightly with your hands.
Bake for 35 - 45 minutes, or until the cake is golden brown and a cake tester inserted deep into the center comes out clean. Transfer the cake to a rack and cool for 10 minutes before unmolding onto the rack to cool at room temperature.
Unmold the cake, and place on a rack. Allow to set for 15 minutes before slicing.
Want more strawberry goodness? Check out these recipes:
Fresh Strawberry, Almond, and Coconut Muffins
Summertime Strawberry Pie
Strawberry Rhubarb Calzones
Skinny Berry Parfaits
And here are more goodies featuring strawberries:
Strawberry Cheesecake Ice Cream at Apple Pies, Patis, and Pate
Strawberry Ice Cream Cake at Culinary Types
Strawberry Banana Chocolate Crumble at Kitchen Parade
Rustic Strawberry Cobbler Cake at Karina's Kitchen
Berry Tartlets at Something Sweet
Strawberry Banana Muffins at The Food Librarian
P.S. Congratulations to two Food Blogga give-away winners: Clever Karen won dinner for two at Carraba's, and Cheryl won two tasty books. And thank you to Lydia of The Perfect Pantry. I won a vegetarian cookbook on her give-away.
Save This Page on Del.icio.us
Sunday, June 14, 2009
How to Make Limoncello
I have featured my dad so many times on my blog I should start paying him. He graciously shared how to make traditional Italian pepper biscuits and pizzelles. He even not-so-graciously demonstrated how to crack the shell of a mammoth 14-pound lobster (the guy's got good biceps). Today he's back to show you how to make limoncello, the uniquely refreshing lemon Italian liqueur.
Limoncello is not difficult to make, but you have to plan ahead; the lemon and orange rinds need to soak for 48 hours. Give yourself 3 days -- 2 for soaking and 1 for the processing and freezing. The actual hands-on time is short, so don't be scared. Plus once you taste that tantalizing sweet-tart lemon, you won't care how long it takes to make. It's like Del's lemonade for adults (that's for my RI readers).
Here's how to make limoncello:
Creamy Limoncello
Print recipe only here.
Update: July 9, 2010: Lately my dad has been soaking the lemon and orange rinds for 1 week, which imparts a more pronounced lemon flavor. The 48 hour soak is still delicious, but it's another option.
1 liter (33.8 oz) pure alcohol – 1 liter = 4.25 cups
8 lemon peels
2 orange peels
2 liters whole milk (67.6 oz) or 8 ¾ cups
5 lbs sugar – 10 cups
1 shot glass whiskey
1 teaspoon pure vanilla extract
1. In a large bowl place lemon and orange peels. Pour pure alcohol over the peels. Soak for 48 hours on the counter top. Note: It's helpful to place a plate on top of the peels so they don't float to the top.
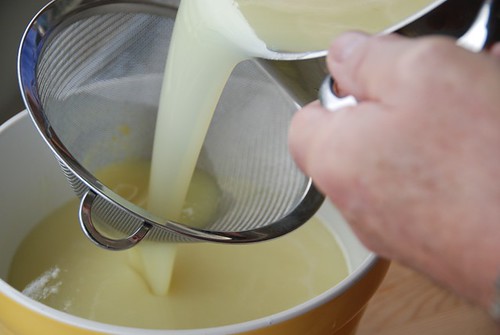
2. Strain lemon and orange alcohol; discard peels. Pour alcohol in a heavy bottomed large saucepan and add milk, sugar, whiskey, and vanilla. Bring to a boil, then reduce until just bubbling, for 5 minutes. Stir continuously, and keep a close eye on it so it does not boil over. Remove from heat and let cool completely. A thin film will form on the top of the limoncello. Using a large spoon, skim it and discard. Then pour limoncello through a fine mesh sieve.
3. Pour into bottles and freeze. Note: We use plastic containers, which are safer to handle than glass. Keep in freezer at all times. Shake before using.
You might also like:
Mini Custards with Limoncello-Spiked Raspberry Sauce
Limoncello is not difficult to make, but you have to plan ahead; the lemon and orange rinds need to soak for 48 hours. Give yourself 3 days -- 2 for soaking and 1 for the processing and freezing. The actual hands-on time is short, so don't be scared. Plus once you taste that tantalizing sweet-tart lemon, you won't care how long it takes to make. It's like Del's lemonade for adults (that's for my RI readers).
Here's how to make limoncello:
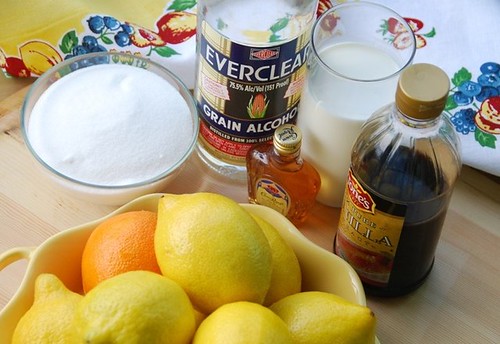
- Gather all of your ingredients: pure alcohol, milk, whiskey, vanilla, sugar, lemons, and oranges.
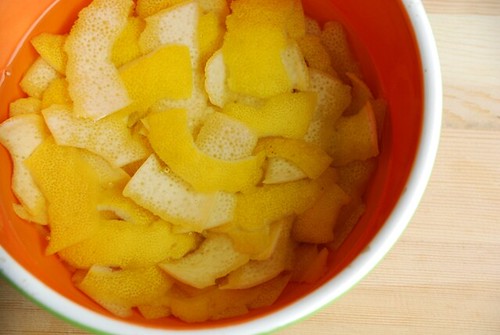
- Soak lemon and orange peels in a bowl filled with pure alcohol, and cover with a plate for 48 hours.
- Strain alcohol, and discard peels.
- In a very large pan, mix milk, sugar, whiskey, and vanilla. Bring to a boil.
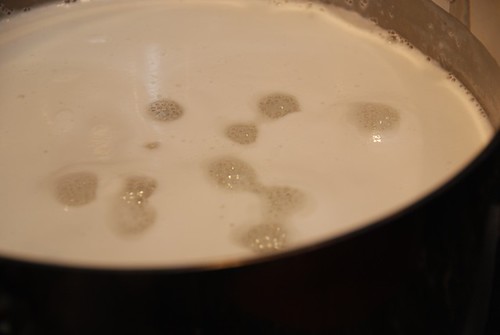
- Lower the heat. The liquid should bubble as shown above. Keep stirring, and don't take your eyes off of it. If left unattended, it will overflow. Trust me. Then it will take you hours to remove the impossibly sticky lemon mixture off of your stove top. You'll curse me forever, and I couldn't live with the guilt.
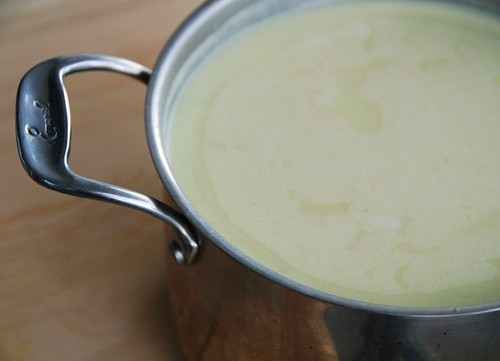
- Once cooled, you will see a thin film form on the top of the liquid.
- Pour the limoncello through a sieve. Pour into bottles and freeze.
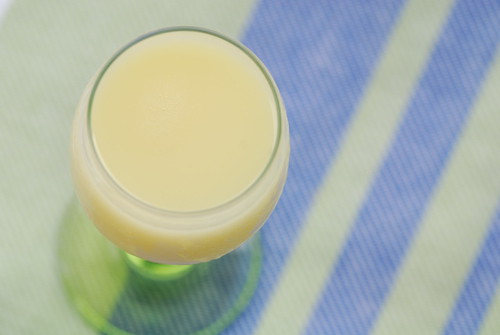
- Sit back, put your feet up, and enjoy a glass of refreshing chilled, creamy, limoncello. You deserve it.
Creamy Limoncello
Print recipe only here.
Update: July 9, 2010: Lately my dad has been soaking the lemon and orange rinds for 1 week, which imparts a more pronounced lemon flavor. The 48 hour soak is still delicious, but it's another option.
1 liter (33.8 oz) pure alcohol – 1 liter = 4.25 cups
8 lemon peels
2 orange peels
2 liters whole milk (67.6 oz) or 8 ¾ cups
5 lbs sugar – 10 cups
1 shot glass whiskey
1 teaspoon pure vanilla extract
1. In a large bowl place lemon and orange peels. Pour pure alcohol over the peels. Soak for 48 hours on the counter top. Note: It's helpful to place a plate on top of the peels so they don't float to the top.
2. Strain lemon and orange alcohol; discard peels. Pour alcohol in a heavy bottomed large saucepan and add milk, sugar, whiskey, and vanilla. Bring to a boil, then reduce until just bubbling, for 5 minutes. Stir continuously, and keep a close eye on it so it does not boil over. Remove from heat and let cool completely. A thin film will form on the top of the limoncello. Using a large spoon, skim it and discard. Then pour limoncello through a fine mesh sieve.
3. Pour into bottles and freeze. Note: We use plastic containers, which are safer to handle than glass. Keep in freezer at all times. Shake before using.
You might also like:
Mini Custards with Limoncello-Spiked Raspberry Sauce
Saturday, June 13, 2009
Win a Dinner for Two at Carrabba's Italian Grill!
Still not sure what to get Dad for Father's Day? Here's your chance to do some shopping with a few clicks on your keyboard.
Carrabba's Italian Grill is offering a lucky Food Blogga reader a chance to win dinner for two at Carrabba's Italian Grill. (Click here for locations nearest you.)
In the event that you win, but you're not near one of the restaurants, then you will receive one of Carraba's Italian cookbooks.
Here's how to win the dinner for two:
I will contact the winner Tuesday morning, so he or she will have time to get the certificate to Dad (unless, that is, you decide to keep it for yourself and give Dad a golf shirt instead).
Good luck, everybody!
Carrabba's Italian Grill is offering a lucky Food Blogga reader a chance to win dinner for two at Carrabba's Italian Grill. (Click here for locations nearest you.)
In the event that you win, but you're not near one of the restaurants, then you will receive one of Carraba's Italian cookbooks.
Here's how to win the dinner for two:
Tell me why you'd like to win this certificate. That's it. Please submit your comment by the end of the day, Monday June 15, 2009.
I will contact the winner Tuesday morning, so he or she will have time to get the certificate to Dad (unless, that is, you decide to keep it for yourself and give Dad a golf shirt instead).
Good luck, everybody!
Friday, June 12, 2009
NPR Is Hosting a Grilled Dessert Contest! Sumbit by 23 June 2009.
Grilled Watermelon Slices with Honey Lime Sauce
from my July 2008 NPR piece, "Watermelon Confidential: Dessert And So Much More"
Think you're pretty hot when it comes to grilling? Then submit your most delicious and creative grilled dessert recipe to NPR. They're going to select "the more inventive submissions" and put them in front of their celebrity chef panel to judge. You'll get bonus points for creativity, but they'd like you to avoid "crazy, obscure ingredients" that are too hard to find.
What do you get if you win? An on-air interview with Liane Hansen, Weekend Edition's host!
Here's the official announcement: "It’s summertime, and that means it’s time to fire up the grill. Have you ever made a dessert on the grill? NPR’s Weekend Edition is looking for your grilled dessert recipes. Be creative! We’re not just talking about grilled peaches. Ever baked a three-tier cake on the grill?
Email your recipes to recipes@npr.org. The entries will be judged by a panel of chefs, and the winner will be interviewed by our host, Liane Hansen. The contest closes on June 23rd. Come to our blog (www.npr.org/soapbox) to find out more."
Good luck, everybody!
Thursday, June 11, 2009
Food, Inc. Book Give-Away!
Looking for a movie to go see this weekend? How about Food, Inc.? It's a documentary film that opens in select theaters this Friday, June 12, 2009. (Click here for additional play dates.)
In anticipation of the film, Magnolia Pictures is offering a lucky Food Blogga reader the chance to win two books: the Food, Inc. Movie Companion book and Eric Scholsser's Fast Food Nation.
Here's what you have to do to win:
Just tell me why you'd like to receive the books. Please respond by the end of the day, Saturday, June 13, 2009. That's it.
One winner will be randomly selected and announced in a future post, so please check back. The give-away is open to all Food Blogga readers. The winner will need to provide her or his real name and mailing address. Don't have a blog? Just leave an active email address where you can be reached. Good luck, everybody!
Click here for the trailer and photos and here to learn more about the film.
Labels:
fast food nation,
food,
give away,
inc
Tuesday, June 9, 2009
You Don't Ignore a Craving for Thai Pineapple Fried Rice
Some blog posts are well thought out and take hours to prepare, while others just write themselves. Then there are the posts that result from cravings, which happened to me yesterday. I was leaving a comment on T. W.'s site, Culinary Types, where he had posted a mighty fine chicken fried rice recipe. I mentioned that I hadn't made fried rice in a long time and that I'd really love some pineapple fried rice.
I woke up at 5:30 am this morning, and before I even thought of coffee, I thought of fried rice. I knew I wouldn't make it to the end of the day without it. So by 7 am -- with a good coffee buzz going -- I was cooking white rice to chill for tonight's dinner. By 5 pm my Thai Pineapple Fried Rice was cooked and photographed to post tonight.
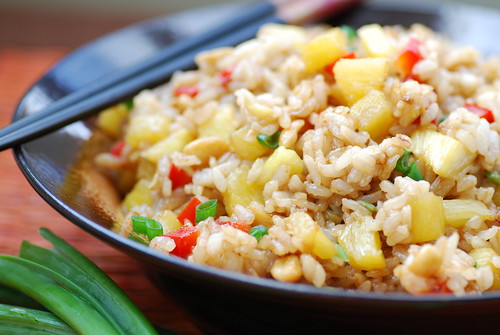
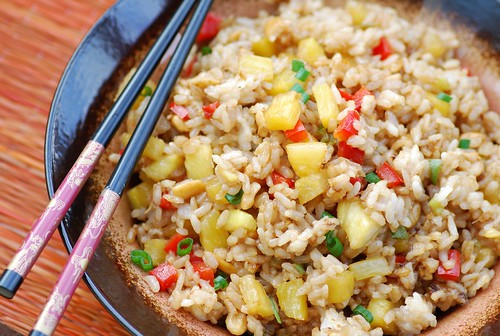
Though I'm not eating it for another hour or so, I had to sneak a couple spoonfuls during the photo session. (Come on, you do it too.) I was so pleased: the flavors of sweet pineapple, spicy ginger, and salty cashews mingle deliciously. I have no doubt that my fried rice craving will be satisfied tonight.
Thai Pineapple Fried Rice
Serves 4
Print recipe only here.
2 cups leftover cooked white rice
1 1/2 tablespoons canola oil
3 scallions, thinly sliced (reserve some of the green part for garnish)
1/2 large red bell pepper, diced
1 1/2-2 tablespoons minced fresh ginger
1 small red or green chili (the more the seeds the hotter the flavor)
1 cup diced pineapple, preferably fresh
2 tablespoons soy sauce
1/2 cup cashews (salted or unsalted)
1 tablespoon dark sesame oil, optional
In a wok or a large skillet over high heat, warm 1 1/2 tablespoons canola oil. Add the scallions, red bell pepper, ginger, and chili. Saute 1-2 minutes, or until lightly sizzling and fragrant.
Add cooked rice, stirring frequently, for 3-5 minutes. Add pineapple, soy sauce, and cashews; stir until well coated and heated through, about 2-3 minutes.
Sprinkle with the scallion greens, and, if desired, drizzle with sesame oil. Serve immediately.
You might also like:
Asian Noodle Salad with Tofu and Mango
Shrimp, Pineapple, and Kashi 7 Whole Grain Pilaf Salad
Gingery Sauteed Tat Soi with Tofu Steaks
Craving more fried rice? Try these:
Thai Pineapple Fried Rice from Kitchen Snippets
Pineapple Fried Rice and Shrimp Fried Rice from Simply Recipes
Prawn Fried Rice from The Perfect Pantry
Kimchi Fried Rice from 80 Breakfasts
Sunday, June 7, 2009
Would You Travel 3,000 Miles for Fig Marmalade?
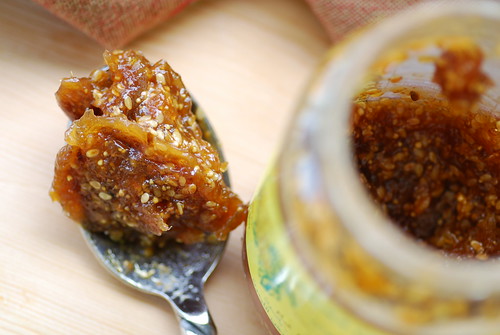
When most people travel they splurge on expensive things like jewelry. Me? I traveled 3,000 miles from San Diego to Providence to buy a $3.29 cent bottle of fig, anise, and sesame marmalade.
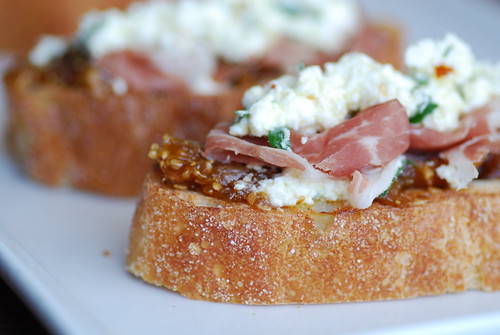
Though I ate most of it straight out of the bottle with a spoon, I was able to save enough to make this Fig, Prosciutto, and Goat Cheese Crostini.
Then, I couldn't stop eating the crostini. It's no wonder. Crunchy ciabatta bread was topped with sweet fig marmalade, salty prosciutto, and tangy goat cheese.
(This marmalade is from Hallak Middle East Market. 1455 Mineral Spring Ave., North Providence, RI 02904. 401-354-8677.)
Before making this crostini -- which you just have to do -- select a really good Italian or Mediterranean deli/market to get the best ingredients possible. As for the fig marmalade, different varieties are available at both Italian and Middle Eastern markets.
If you want the best fig marmalade though, book a ticket on Southwest to the PVD airport (they're currently running a sale). Then call my mom for directions.
Fig, Proscuitto, and Goat Cheese Crostini
Serves 8-10
Print recipe only here.
1 loaf ciabatta, cut into 8-10 equal size slices
8 ounces (1 cup) goat cheese
1/4 cup extra virgin olive oil
2 teaspoons finely chopped fresh parsley
1/4 teaspoon crushed red pepper flakes
8-10 slices prosciutto (about 4 ounces)
8 ounces (8 tablespoons) fig marmalade or jelly
Place bread slices on a large baking sheet. Broil for 2-3 minutes or until golden brown.
Meanwhile in a small bowl mix goat cheese, olive oil, parsley, and red pepper flakes. Set aside.
Spread each slice of toasted bread with 1 ounce of fig marmalade, then 1 slice of prosciutto; top with 1/8 of the goat cheese mixture. Repeat with remaining slices.
You might also like these appetizers:
Camembert and Kumquat Chutney Toasts
Roasted Pepper, Olive, and Brie Bruschetta
Grilled Eggplant with Roasted Red Pepper Tapenade
More delicious crostini:
Crostini of Creamy Mushroom with Lemon and Mint at Kitchenography
Kale and Myzithra Crostini at Mediterranean Cooking in Alaska
Italian Style 7-Layer Dip for Crostini at Ms. Adventures in Italy
Sun-Dried Tomato Jam Crostini at Feasts and Fotos
Save This Page on Del.icio.us
Thursday, June 4, 2009
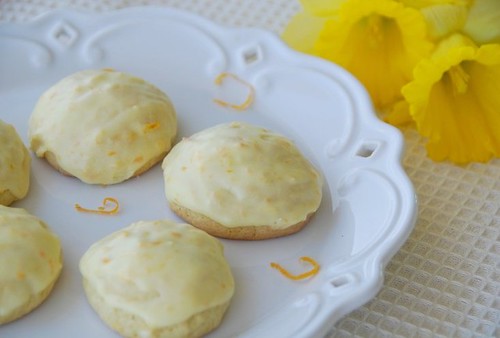
A Delightful Recipe for Orange Delight Cookies
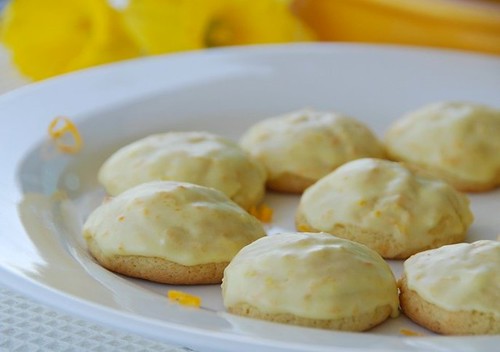
Delight your friends and family with a batch of frosted orange delight cookies from Anita Chu's Field Guide to Cookies. I have made several of Anita's cookies, and these are by far my favorite: they're moist, light, and refreshingly tangy, which makes them the perfect spring and summer cookie.
As many of you already know, I'm currently writing A Field Guide to Sandwiches, which will part of the same popular series for which Anita has written. I want to send a BIG thank you to everyone who has so kindly wished me well. You always brighten my days. Also several people have emailed me asking if I'll need recipe testers. Yup! I sure will. I'll post an announcement for it when the time rolls around, so you can test (and eat) some delicious sandwiches if you'd like.
In the meantime, eat your cookies.
Orange Delight Cookies
Makes approximately 30 cookies
Print recipe only here.
(NOTE: The recipe calls for a stand mixer. If like me you don't have one, then a hand mixer works just fine.)
Cookies:
2 cups all-purpose flour
1/2 teaspoon baking powder
1/2 teaspoon baking soda
1/2 teaspoon salt
2/3 cup softened unsalted butter
3/4 cup sugar
1 egg
2 tablespoons orange zest
1/2 cup orange juice
Orange frosting:
2 1/2 tablespoons softened unsalted butter
1 1/2 cups confectioners' sugar
2 tablespoons orange zest
1 1/2-2 tablespoons orange juice (I used closer to 2 1/2 tablespoons)
Preheat oven to 400 degrees F.
Sift flour, baking powder, baking soda, and salt into a medium bowl and set aside.
In a stand mixer, cream butter and sugar on medium speed for several minutes until light and fluffy. Add the egg and orange zest and mix until combined. Add flour mixture and orange juice in three additions, alternation between the flour mixture and the juice.
Drop tablespoons of dough onto an ungreased cookie sheet at least 1 1/2 inches apart. Bake for 8-10 minutes. Remove and allow to cool on wire racks for at least 30 minutes before frosting.
For the frosting: In a stand miner, cream butter and sugar at medium speed for several minutes until light and fluffy. Add orange zest and juice, and mix until smooth. Frost cooled cookies using using a mini rubber spatula (or as I did, my index finger).
You might also like these spring and summer time desserts:
Coconut-Lime Rice Pudding with Mangoes and Cashews
Strawberry-Rhubarb Sponge Pudding
Mini Custards with Limoncello-Spiked Raspberry Sauce
Here are more citrus spiked cookies:
Limoncello Glazed Ricotta Drops at My Gourmet Connection
Meyer Lemon Cookies at Canela and Comino
Lemon Lime Meltaway Cookies at Appoggiatura
Candied Orange Sugar Cookies at Technicolor Kitchen
Chocolate Orange Cookies at Lisa's Kitchen
Subscribe to:
Posts (Atom)